LantauMama - making healthy living accessible
  • Blog
    • Family Fun
    • Cantonese School
    • About Me
  • Classes
  • Events
  • Shop
  • Links

Homemade Kefir Ice Cream

15/3/2015

0 Comments

 
(Raw, Fermented, Gluten Free)
Picture
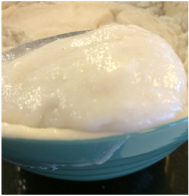
Homemade ‪kefir ice cream! More like an in between frozen yogurt and sorbet taste and texture. Big hit with the adults and the kids!

Ingredients
  • 2 cups of milk kefir
  • 1/2 cup low GI coconut nectar (or other healthy sweetener)
  • Large handful of frozen or fresh strawberries (or other fruit)
  • Optional - 1/8 cup of smashed up homemade chocolate 
  • Optional - 1-2 drops of lemon oil to make the flavors 'pop'

Directions
  • Blend the milk kefir, coconut nectar and berries in your blender (I use a Vitamix)
  • Optional - add 1-2 drops of lemon essential oil
  • Add this to your ice cream machine
  • Optional - Add the smashed chocolate

Follow the directions for your ice cream machine.
Serve and Enjoy!

0 Comments

Raw Vegan Not Cheesecake - White and Chocolate Cherry

30/9/2014

1 Comment

 
Print Friendly and PDF
Picture
(Raw, Fermented, Gluten Free, Vegan Option)

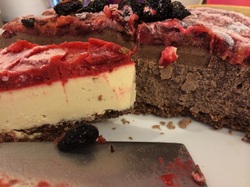
These two cakes go together perfectly and are enjoyed by children and adults alike.  Best of all, everyone gets a thin slice of each. These are a bit different from the usual raw cheesecakes, as I add probiotic fermented goodness by using water kefir in the middle layer! 

Each cake is measured for 1 deep 9 inch springform pan or two shallow aluminum pie dishes.  

The Base (the same one from Our Birthday Cake)
  • 1 Cup (around 16) de-stoned dates
  • 1 cup of nuts (cashews, macadamia, almonds, etc...)
  • 1 cup shredded coconut
  • 2 Tablespoons raw cacao powder
  • 1/2 Tablespoon vanilla powder
  • 1/4 teaspoon pink Himalayan salt

Put in a food processor and blend well.
Put in a pie dish or tray, cover with parchment paper, then smoosh down until evenly flat on the bottom.
Put in freezer or fridge.


White Middle Layer:

  • 3 Cups cashews, soaked 2 or more hours, then drain and rinse
  • 3/4 Cup lemon juice
  • 3/4 Cup raw honey (coconut nectar if vegan)
  • 3/4 Cup coconut oil, melted
  • 1 Tablespoon liquid vanilla extract
  • 1/4 cup of water kefir (or water) as little as needed for blending

Blend everything together except the cherries until completely smooth.
Add the cherries last and blend lightly, so some chunks are left for texture and flavorful bites.
Pour on top of the base, and put back in the freezer.

Top Layer:
  • 2 Cups of frozen strawberries
  • 1/2 Cup (around 8) de-stoned dates
  • 1 Tablespoons of lemon juice
  • 1/8 teaspoon of pink Himalayan salt

Blend together, then pour on top of the middle layer and out back in the freezer.

Chocolate Cherry Middle Layer:

  • 3 Cups cashews, soaked 2 or more hours, then drain and rinse
  • 3/4 Cup maple syrup or coconut nectar (or ½ ½) 
  • 1 Cup of water kefir (or water)
  • 1/4  + 1/8 Cup raw cacao butter, melted
  • 1/4 + 1/8  Cup coconut butter, melted
  • 1 1/2 teaspoon vanilla powder 
  • 1/4 heaping teaspoon of pink Himalayan salt
  • 1 1/2 Cup raw cacao powder
  • 3/4 Cup frozen cherries (or unsweetened dry cherries also work)

Blend everything together except the cherries until completely smooth.
Add the cherries last and blend lightly, so some chunks are left for texture and flavorful bites.
Pour on top of the base, and put back in the freezer.

Top Layer:
  • 1/4 Cup of frozen cherries (or unsweetened dry cherries also work)
  • 1 Tablespoons of lemon juice
  • 1/8 teaspoon of pink Himalayan salt

Blend together, then pour on top of the middle layer and out back in the freezer.

You could also add some berries, fresh, frozen or dried on the top of the cake - my daughter likes a heart shape!

Another option is to get fancy and make a 'layered' cake by doing the base, then half of the white middle layer, freeze for a while, then half of the chocolate cherry middle layer. 

Notes: You must take it out of the freezer about 20 minutes before serving so it is soft enough to cut.  It will eventually melt, so it should be eaten cold.  You can see in the photo the texture of the white is perfect, while the chocolate was still a bit frozen when sliced.  If you have leftovers, wrap the pieces individually in the freezer so it is easy to eat one piece at a time.

Credits:
http://www.therawtarian.com/raw-cheesecake-recipe
http://gliving.com/blackforest-chocolate-cheesecake-2/
1 Comment

Yogurt Chia Crunchy Fruity Bowl

5/9/2014

 
Print Friendly and PDF
Picture
(Raw, Gluten Free, Sugar Free, Vegan Option)


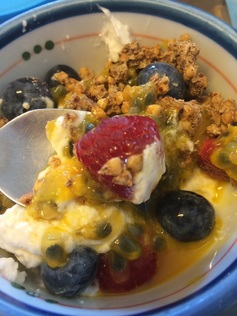
Coconut yogurt is a healthy snack, with good fats and probiotics.  Add chia seeds and you get the added boost of fibre and omega-3!

This is one of my all time favorite breakfasts or snacks.

Ingredients
  • Coconut Yogurt Kefir ** (see substitutions below***)
  • 1-2 Tablespoons of chia seeds
  • Slice up your favorite seasonal fruit for flavor – bananas, mangoes, berries, passion fruit, pomegranate, etc…
  • Add some raw nuts for crunch
  • Some cacao nibs or sweetened cacao nibs for a treat
  • Sprinkle with some plain oatmeal or raw buckwheat granola

Directions
  • Mix the chia seeds with the yogurt and let soak at least ten minutes before eating.  
  • Add the rest of the ingredients, either mix or layer depending upon your preference.

You can either mix this up for a casual bowl, or layer it beautifully in champagne glasses for a lovely parfait.  It makes a perfect breakfast or morning snack at your desk.  It is easy to make up the night before and store in the fridge too!

** Note - Coconut yogurt is very filling, I often find just a 1/4 cup is enough for one sitting, so start small as you can always add more.

*** Substitutions – instead of coconut yogurt kefir, you could use milk kefir, whole fat plain greek yogurt or whole fat plain yogurt.  Do be sure to choose a yogurt with no added sugar.


Two Tone Lemon Chocolate

31/5/2014

 
Print Friendly and PDF
Picture
(Gluten Free, Vegan, Raw, Refined Sugar Free)

Lemon is the flavor of the season for me - Lately, I am all about my preserved lemons, lemon kefir water and lemon chocolate!

Making raw chocolate is easy and fun.  I make coconut oil chocolate, chocolate with cacao butter and chocolate with cacao paste.  

This recipe uses both coconut oil and cacao butter.  Which give the health benefits of the coconut oil, with texture and flavor from the cacao butter too.  There is a minimal amount of raw cacao powder. The result is a very smooth texture and a subtle flavor - enhanced with lemon oil.  

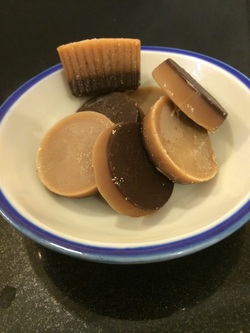
They look so very pretty 'two toned' - with the sweetener and cacao settling on the bottom and the lighter coconut oil on the top.  

It's a gentle flavor, and absolutely tastes best straight from the freezer.  The thin 'coin' shaped ones are a perfectly cold, crisp, refreshing raw chocolate.


Ingredients
  • 1/2 cup of raw cacao butter
  • 1 cup of coconut oil
  • 4 Tablespoons of raw cacao powder (you can add more if you prefer)
  • 2-3 Tablespoons of coconut nectar, maple syrup or sweetener of your choice (add to taste)
  • 10 drops of lemon oil (food grade)

Directions
  • Gently melt the cacao butter and coconut oil in a large glass measuring cup with a spout  (I do this in my dehydrator at 115 degrees F, you can also use a double boiler or over low heat in the oven or stove)
  • Add the cacao powder, mix well with a fork or whisk (add more if you want it more chocolatey)
  • Add the coconut nectar to taste - start with a bit, mix it, taste it, add more until you get the right sweetness for you
  • Mix well
  • Add 5-10 drops of lemon oil - again, add 5 first, taste, and add more if you want.
  • Alternatively you could add peppermint or your favorite flavors 
  • Mix well

Option:  You can also opt to put all the ingredients in a blender and whip it up that way - this does result in an even smoother final product, and I recommend doing this if you use a granular sugar or want less of a two toned result. 

  • Pour into chocolate or silicon molds, or on a large piece of parchment paper
  • Put in the freezer overnight, until they are totally solid
  • Pop them out of the molds, or break up the chocolate on the parchment paper and store in the freezer as a special treat

Please note, these will melt at room temperature due to the high amount of healthy coconut oil, they store best in the freezer.

Related Links
Healthy Chocolate or Carob Bark
50 Wicked Bites - Raw Chocolate

Probiotic Ice Pops

6/5/2014

 
Print Friendly and PDF
Picture
( Fermented, Vegan, Raw, Gluten Free, Sugar Free) 

What kids don't love ice pops?  Especially on a hot summer day in Hong Kong, these are a go-to snack!

I have always made homemade ice pops for my kids, usually with fruit. Watermelon and chia seeds is the all time favorite, with coconut water and mango coming in a close second.

Now our ice pops have an extra probiotic boost from kefir!

Ingredients
  • 2 cups of cut watermelon and strawberries or other fruit
  • 1 cup of water kefir or milk kefir
  • a handful of blueberries

Directions
  • Put the fruit and water kefir or milk kefir in your blender
  • Blend for 1 minute or until all the fruit is blended
  • Pour into your ice pop molds
  • Add a few blueberries to 'float' in the ice pops - my kids love the 'blueberry surprise' when they eat them!

Flavor ideas
  • Water kefir + watermelon + chia seeds
  • Water kefir + watermelon + strawberries + chia seeds
  • Water kefir + berries + chia seeds
  • Milk kefir + mango
  • Milk kefir + strawberry 
  • Coconut water kefir + mango
  • Lemon water kefir + pineapple
  • Coconut yogurt + mango
  • Kefir Colada Pops


How to make Kefir - http://www.lantaumama.com/blog/kefir-the-probiotic-elixir-class-notes

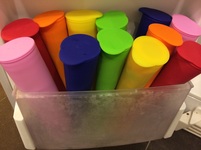
Below are the exact ice pop molds we use.  We even bring them on holiday with us so we can have ice pops everywhere we go!

Silicon Ice Pop Molds - these fit great in the freezer, and are good for ages 7 and up
Rocket Ice Pop Molds - these are easy to fill, and are larger so good for ages 5 and up
Star/Flower Ice Pop Molds - these are easy to fill, and are larger so good for ages 5 and up
Ring Pop Molds - perfect size for younger kids - or bigger kids whom are not so hungry

Click on the photo below to be brought to the appropriate Amazon page.  If you buy from that link, I get a tiny tiny commission (pennies), and it doesn't cost you anything extra :)


Coconut Yogurt Kefir

5/5/2014

 
Print Friendly and PDF
Picture
( Fermented, Vegan, Raw, Gluten Free, Sugar Free) 

So easy, so yummy, so good for you!  In Hong Kong, fresh young coconuts are easily available at the local supermarkets.  They provide lovely fresh coconut water to drink, and soft creamy coconut meat to eat.  Making coconut yogurt kefir is a great way to add even more probiotics to your daily diet.

The coconut water, you can drink straight, or ferment into coconut water kefir.


Ingredients
3-4 young coconuts
1/2 Cup of water kefir (more or less depending how much 'meat' your coconuts had)
1 Tablespoon of water kefir grains (optional)

Directions
Scoop the meat out of the young coconuts
Put it in your high speed blender (I use a Vitamix)**
Start to blend to see how thick/thin it is
Add enough water kefir to blend it smooth and creamy - to the consistency you want

Optional - if you have extra kefir grains you can add them too, this will make the coconut yogurt ferment more, but might get too sour for some people. This is completely optional, I only do it when I have a load of extra grains and know I will eat the coconut yogurt within 1-2 days.

You can eat it fresh at this point - my daughter loves it!
Alternatively, you can put it in a bowl on the counter to ferment for a few hours.  It goes fluffy and more sour this way, but I still love it (daughter does not).

Coconut yogurt can be eaten plain, added to a bowl of cut fruit, eaten with cereal, enjoyed as a creamy topping to any raw dessert and more.  It will last in the fridge up to 3 days so no need to finish it all at once.  After 3 days I find the taste is a bit too sour for most people.  
I also like to dehydrate coconut yogurt into coconut wraps - just spread thick on your non-stick dehydrator sheets!  For more on dehydrating click here.

WARNING!  Even in the fridge it expands, so please make sure your jar has room for the ever growing coconut yogurt.

** Note on blenders - you really do need a high speed blender to get coconut yogurt to the right consistency, regular power blenders just don't get it 'creamy' enough.

To learn how to open a coconut check out many videos on youtube or see this step by step photo instructions from Loulanatural:
How to Open a Coconut, step by step with photos

Related Links
Coconut Water Kefir
Loulanatural - Coconut Yogurt


Chocolate - 50 Wicked Bites

13/3/2014

 
Print Friendly and PDF
Picture
(Raw, Gluten Free, Vegan, No Refined Sugar)

This is a special gift, for someone with the special gift of healing.   Richard Wickes is an amazing physical therapist, whom also specializes in at fascial therapy, Yuen Method and his very own Wickes Way.  Richard approaches healing the body through the physical, emotional, spiritual and energetic.  Honestly, I have no idea how he does it or what he actually does, but he has helped me on many occasions, you can contact him at Strengthen Everything. 

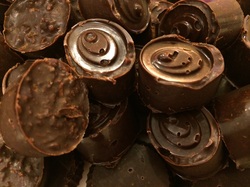
This recipe is for him, well to be more precise the chocolate I made using this recipe were a gift for Richard.  I promised him some homemade chocolate in return for a very urgent treatment he gave me.  His request was peppermint and coconut, and the final result is truly wicked!  Just as Richard brings out the best in his clients, this chocolate is truly the best I have ever made.

This amount makes about 50 bon-bon size bites or a full size chocolate bark.

Ingredients
  • 1 1/2 cups raw cacao paste (shaved off the block with a knife)
  • 3 Tablespoons coconut oil
  • 3 Tablespoons coconut nectar (heaping)
  • 2 Tablespoons carob pod concentrate (heaping)
  • 1 teaspoon BaoBaob fruit powder
  • 1/2 teaspoon pink Himalayan salt or Celtic sea salt
  • 1 teaspoon peppermint extract (or more)
  • 1 Cup shredded coconut flakes

Directions
  • Melt the raw cacao paste and coconut oil together (at low heat in the dehydrator or double boiler or oven - keep below 105 degrees Fahrenheit)
  • Mix well
  • Add the coconut nectar and taste
  • Add the carob pod concentrate and taste
  • (NOTE: If you don't have those, you can use coconut sugar or maple syrup - any sweetener of your choice, but taste as you go to get the right level of sweetness for YOU)
  • Mix well and adjust sweetness level until it is right for you
  • Add the BaoBaob fruit powder - this is super tangy and adds a special taste
  • Add the salt
  • Add the peppermint, mix well an taste again - you might opt to add more
  • Add the coconut flakes, mix well

Now it is time for you to either:
Put the chocolate in the molds, using a spatula to smooth it into each shape
or
Put a piece of parchment paper on a dinner plate, and pour the chocolate on that and smooth

Then put it in the fridge or freezer for 8-12 hours until totally solid
Finally, remove from the molds or chop the bark and put in a storage container in the fridge
Note: if you take them out of the mold too early, they might look like mine do in this photo - I was in a bit of a rush and made them very fresh for the gift, so they didn't set perfectly.

Since this is primarily cacao paste, it holds it's form at room temperature very well - but like any other chocolate, not in extreme heat.

Related Links
LantauMama - Homemade 'healthy' Chocolate or Carob Bark

It's NOT Nutella 

28/2/2014

 
Print Friendly and PDF
Picture
(Raw, Gluten Free, Vegan, No Refined Sugar)

I was playing around in the kitchen, and made something that is definitely not Nutella, it is not trying to be Nutella, do please don't expect Nutella, but it is quite yummy and not very sweet.

Basically, I wanted something chocolatey but soft and creamy and nutty, and for a change not my homemade chocolate.  

So I came up with this, and it hit the spot.   I've made a few variations and can really say that each different nut really gives it a totally different texture and taste - so experiment with some small batches with different nuts and see what you like best (I'm partial to almond).

It can be used as a dip, a spread, a ganache for a hard chocolate shell or just eaten off the spoon.  If you put it in the fridge it will get solid, if you leave it on the counter, it will be softer.  

This makes a very very small amount, so 2x the recipe if you want more. 

Ingredients

  • 1/4 cup of nuts almonds, macadamia, cashews, hazelnut, whatever you fancy - each will give a slightly different characteristic to the final product (soak nuts 8 hours first; except the cashews only need 2-3 hours)
  • 1/4 cup of raw cacao powder
  • 1/4 cup of coconut oil (solid rather than liquid works better)
  • 1 teaspoon of maca powder
  • 1 teaspoon of vanilla extract (liquid)
  • 1-2 Tablespoon of coconut nectar, carob extract or maple syrup 
  • NOTE - add less or more of your sweetener depending on your personal preference, I only add 1 Tablespoons total

Directions
  • Put all ingredients into your blender or small food processor
  • Blend
  • Scrape down sides if needed
  • Blend
  • Taste
  • Add more sweetener to your desired taste
  • Blend until it tastes perfect to you

Pour into jar to store on counter or in the fridge.  It will get very firm in the fridge, and softer on the counter.  
Putting it into little jars as gifts works really well too.  

Picture
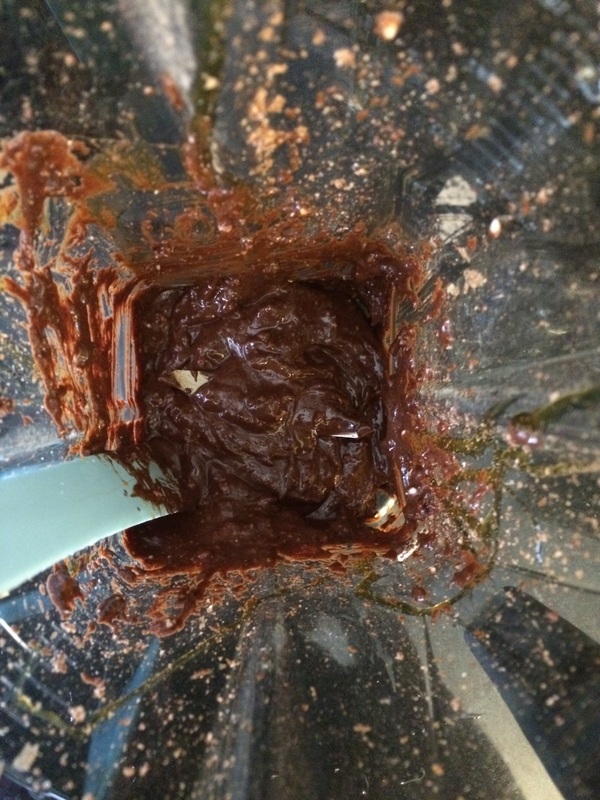
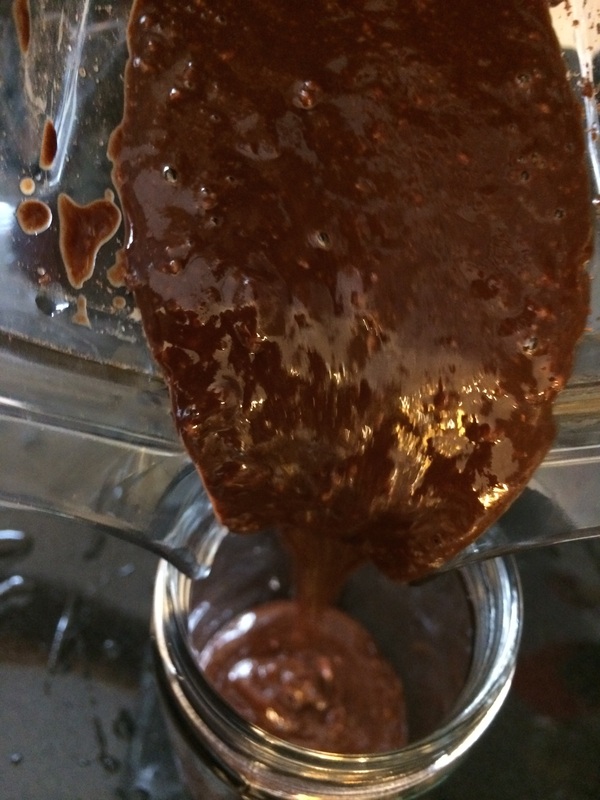
In the blender
Picture
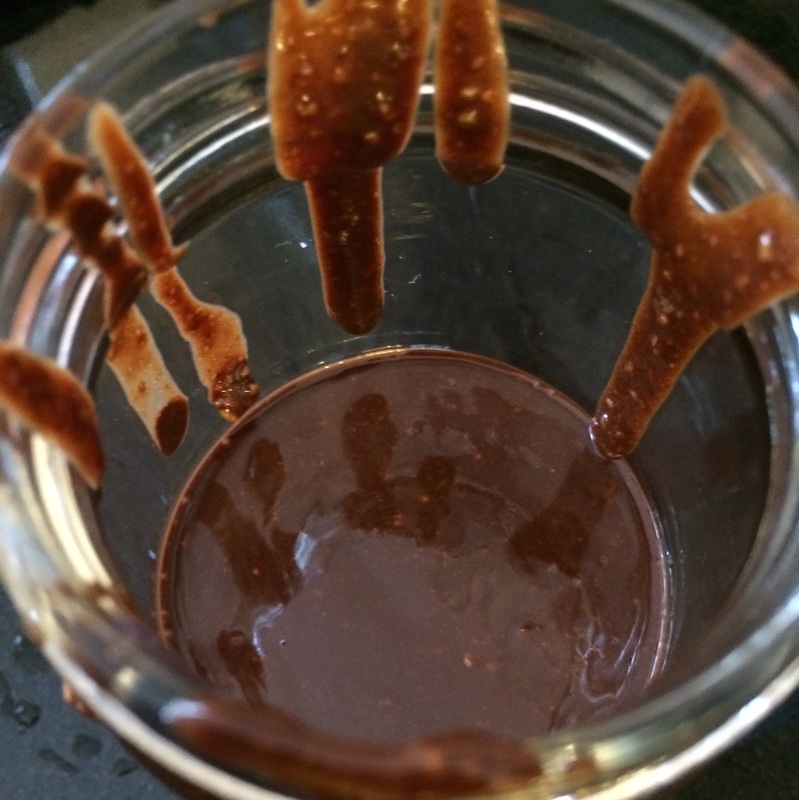
Pouring into the jar
Picture
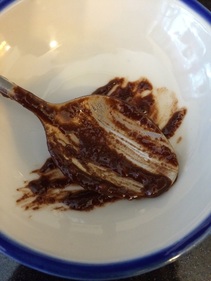
This really makes a tiny amount. If you put the jar in the fridge, it will get solid. If you leave it on the counter is is very soft depending on the temperature.

Homemade Almond Milk Kefir

17/2/2014

 
Print Friendly and PDF
Picture
(Gluten Free, Vegan, Raw, Fermented, Refined Sugar Free) 


I love almond milk.  I love kefir.  What better than homemade almond milk fermented with kefir grains?!

This drink is smooth and tangy at the same time, and chock full of great probiotics for you.

Drink it straight, put it in your muesli, or mix it with some chia seeds for a raw dessert - however you use it it won't last long.

There are two steps to this process, first to make the almond milk, second to ferment it.

Do watch the slide show below for key steps in images and captions.  

Ingredients
  • 2.5 cups of almonds, soaked for 4-12 hours
  • 5 cups of water
  • 5 dates (soaked for 2-12 hours)
  • 1/2 Tablespoon of vanilla extract
  • 1/8 teaspoon of pink Himalayan salt 

Directions
  • Drain and rinse the almonds after they have soaked
  • Put all ingredients in your Vitamix or other high speed blender
  • Blend until smooth - 1-2 minutes
  • Strain through a cheese cloth, nut milk bag or Chinese soup bag**
  • Squeeze to get all the liquid out
  • Put the almond meal aside to use in the fabulous Raw Brownies with a Secret recipe.
  • Pour the almond milk into a glass jar

Now, you could just stop here, and enjoy your almond milk - and trust me, I did, at least one glass before fermenting the rest!

To Ferment
  • Add 2 Tablespoons of kefir grains*** to your large glass jar of almond milk
  • Cover with a cloth and rubber band and place in a warm place to ferment (the top of the fridge is good)
  • Ferment for 4-12 hours depending on the weather - taste after 4 hours, then every couple hours until it is the taste you like
  • Don't worry if the almond milk kefir separates (see photo below), it is normal, just stir it with a non-metal stirrer and either keep fermenting or strain depending on the taste.  
  • Once it tastes right to you, strain the grains with a plastic strainer
  • Save the grains in a glass jar in the fridge to use again

Once fermented, put in a glass bottle with a lid put in the fridge.

We usually finish it within two days, but it will last almost forever in the fridge. Did I mention a glass of Almond Milk Kefir goes great with these Raw Brownies?

You can also use this to make an awesome smoothie - almond milk kefir, some berries, acai berry powder and a banana - sooooo good!  This is a great way to use it if you accidentally ferment it a bit too long.

** Chinese Soup Bags can be found in the local ParkNShop or Wellcome in Hong Kong, they cost about 10 HK for 3 bags - great value and perfect for nut milk!

*** I use water kefir grains, then I keep them separate from my other grains in a jar dedicated to using with nut milks.  You can also use dairy milk grains, and they will work fine as well, it depends on what you have.

**** The reason I keep my nut milk grains separate from my other grains, is so that if I am sharing grains with someone with a nut allergy, I know not to give them the nut contaminated grains.  This is just a precaution because I love sharing my kefir grains.

Related Links
LoulaNatural - Raw Almond Milk
LoulaNatural - Kefir FAQ


Raw Brownies with a Secret Ingredient

17/2/2014

 
Print Friendly and PDF
Picture
(Gluten Free, Vegan, Raw Refined Sugar Free)

Recently, I made some fabulous homemade almond milk, which I then fermented into fermented almond milk kefir.  Super yummmmy!  It left me with a whole load of raw, slightly damp, almond meal.  

I knew just what I wanted to make - raw balls!  Then as I was rolling them, I decided to do raw brownies instead.  See, this is how I cook, or not cook in this case... I go by feel and mood, and often forget to take photos or write notes.  So most of the recipes on this site I have made numerous times taking notes, so I can share them with you.

They have two different additions to most raw balls or raw brownies:
1 - black mission figs, the only reason I used any dates at all, was that I ran out of the figs, the figs really made a difference.  I made another batch with only dates (I was out of figs) and it was good, but not as good as the batches with figs.  So in short, use figs!
2 - peppermint extract, the flavor pulled the whole taste together perfectly

Ingredients
  • 1.25 cups of slightly damp almond meal OR 1.5 cups of dry almond flour
  • 1/2 cup of black mission figs (ideally soaked for a couple hours)
  • 1/2 cup of dates (ideally soaked for a couple hours)
  • 3/4 cup of coconut flakes 
  • 1/2 cup hemp seeds 
  • 1/2 cup raw cacao powder (more or less to your taste)
  • dash of Himalayan pink salt
  • 1/2 Tablespoon of peppermint extract - shhhh, this is the secret ingredient 

Directions
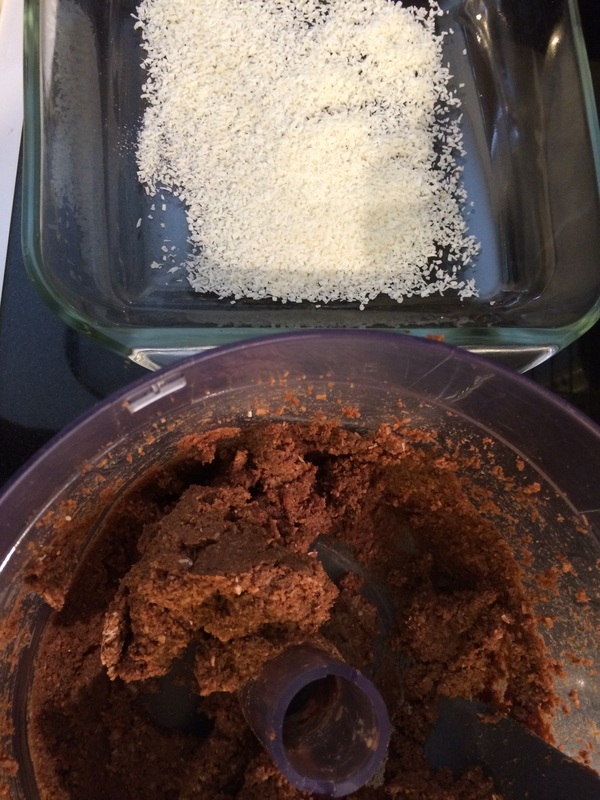
  • Place all the ingredients in a food processor and blend until it forms a ball
  • Taste, see if you want to add anything at this point, then add
  • Scrape down the sides, smash the ball, and blend some more
  • The less blended the more texture - if you blended it a lot, but like more texture, add some extra coconut flakes or hemp seeds right at the end.  
  • If it is too dry, add some of the liquid from the soaked figs/dates
  • Prepare a glass baking tray by putting a layer of coconut flakes in the bottom
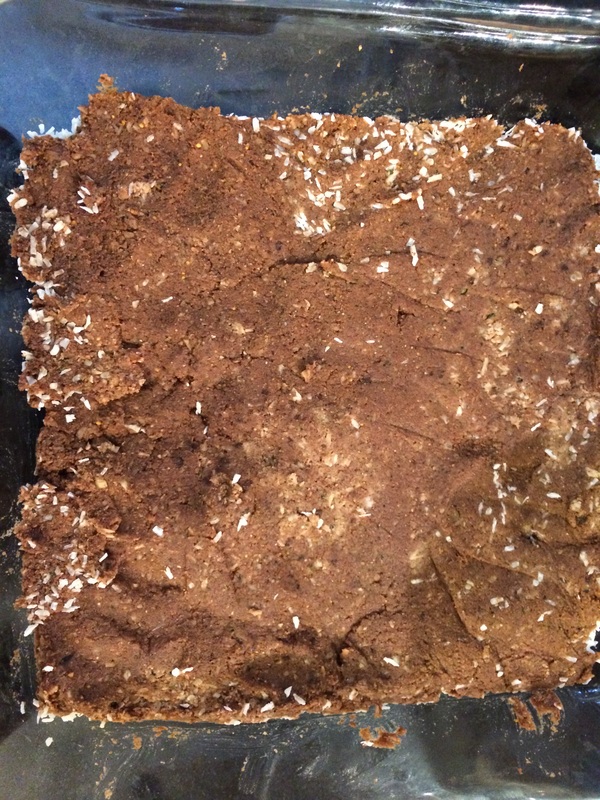
  • Press in the brownie mixture
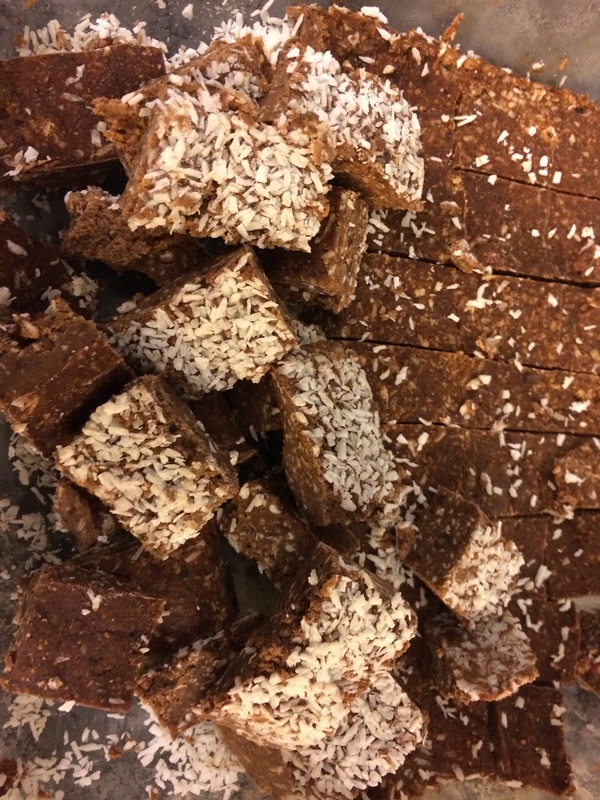
  • Set in freezer for 3-12 hours, then cut into very small brownie bites

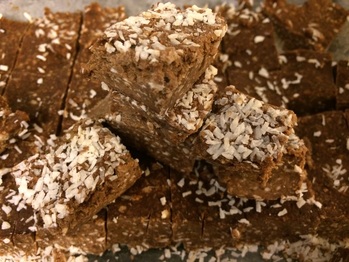
These can then be stored in the freezer for months or in the fridge for a couple weeks - but they won't last that long!  My kids love them, and they go great with a glass of homemade almond milk kefir.

Picture
Ready to press
Picture
Ready to freeze
Picture
Ready to eat
<<Previous
    Picture

    LantauMama's Instagram

    Categories

    All
    Breakfast
    Dessert
    Events
    Fermentation
    Healthy Living
    Hong Kong
    Kefir Class
    Kids
    Niseko
    Recipes
    School
    Snacks
    Tuesday-tips

    Archives

    May 2018
    January 2018
    December 2017
    October 2017
    August 2017
    March 2017
    February 2017
    November 2016
    January 2016
    December 2015
    September 2015
    June 2015
    May 2015
    March 2015
    September 2014
    August 2014
    July 2014
    June 2014
    May 2014
    March 2014
    February 2014
    January 2014
    December 2013
    November 2013
    October 2013

    RSS Feed

    View my Flipboard Magazine.
Thank you so much for taking the time to visit Lantau Mama, truly I am flattered that anyone reads this!  
Feel free to contact me anytime via LantauMama @ Twitter I would love to hear from you.
The links below are how I try to cover my hosting costs without using advertisements.
My Iherb Page
Weebly Discount Link