LantauMama - making healthy living accessible
  • Blog
    • Family Fun
    • Cantonese School
    • About Me
  • Classes
  • Events
  • Shop
  • Links

Health Boosting Drink

25/11/2013

 
Print Friendly and PDF
Picture
Lack of sleep destroys me, literally, I had very little sleep last week, and this week feel awful with laryngitis and a very sore throat, even whispering or speaking softly hurts.

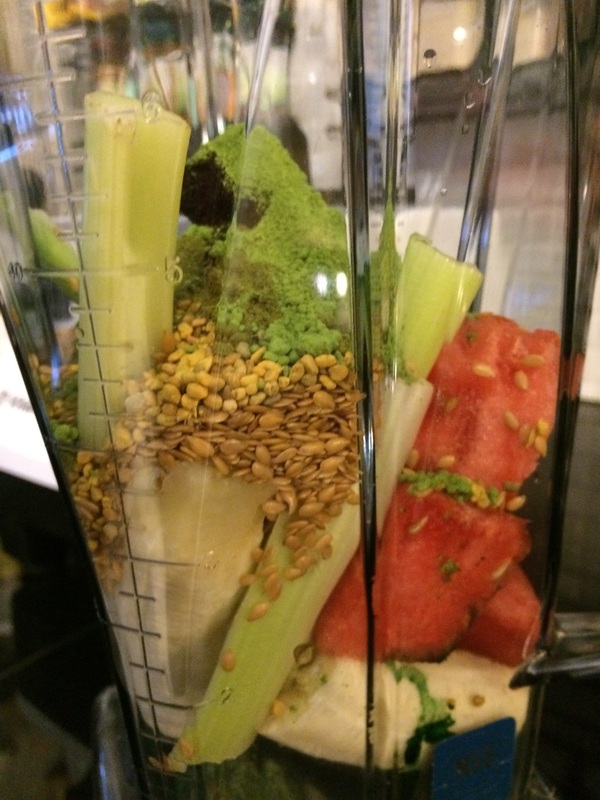
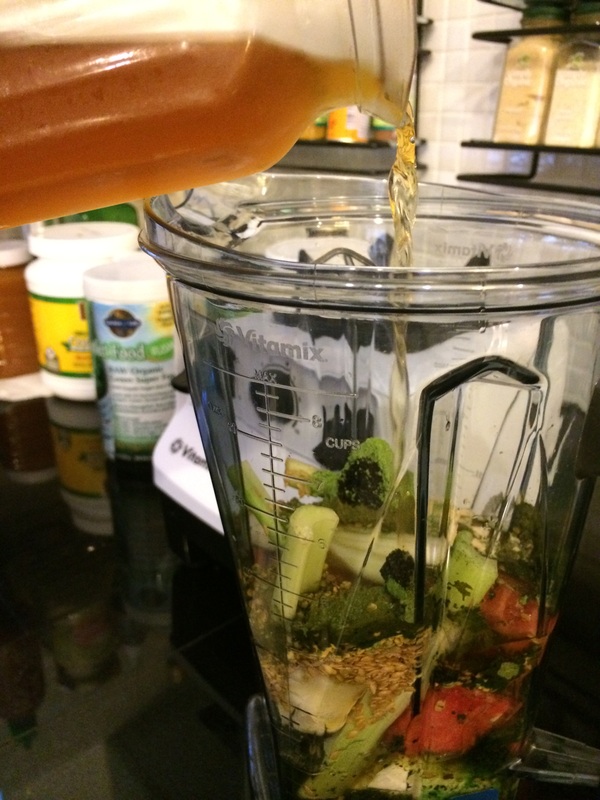
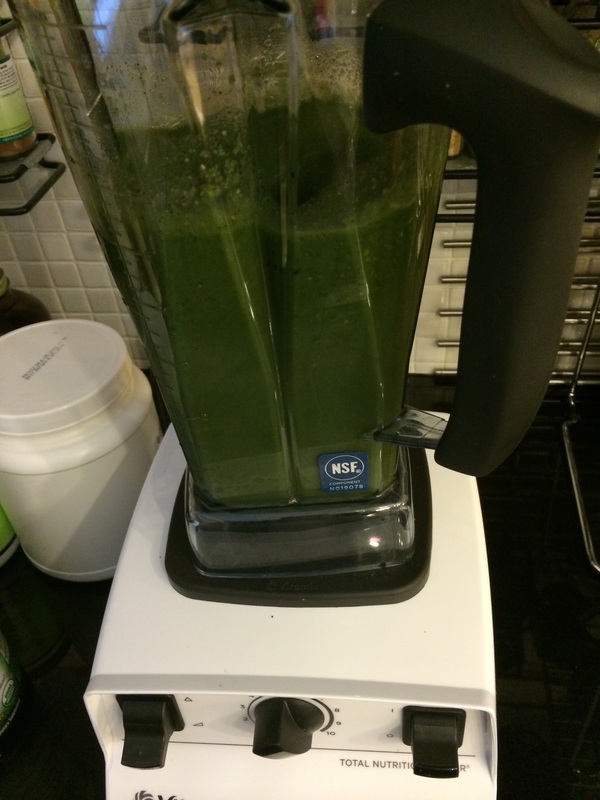
This morning, thinking about Louise's great morning drink, I whipped up this in my Vitamix.

  • 2 small pieces of fresh turmeric
  • 2 large chunks of fresh ginger
  • 1 whole lemon, pitted and peeled 
  • 1 Tablespoon of cinnamon
  • 1 Tablespoon of raw honey
  • 1 Tablespoon of raw apple cider vinegar
  • 1 Cup of water kefir

If you don't have all the ingredients, don't worry, make it with what you do have and be creative.  As usual, any blender will work, just use what you have.

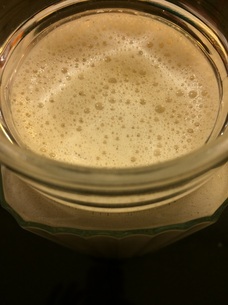
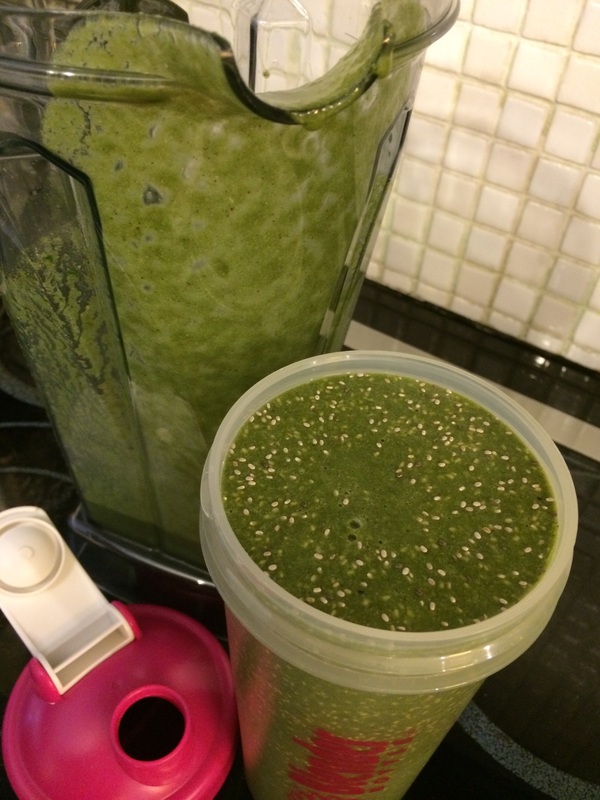
I drank it with a glass straw to get maximum benefit for my throat and get into my body as fast as possible.  The Vitamix did make it super frothy, so  it might be best to wait a bit before drinking... not that I did.  

Can't say if it helped or not, but it tasted great and I'll have this again later today and tomorrow morning.

Carob Cacao Coconut Macaroons

24/11/2013

 
Print Friendly and PDF
Picture
(Gluten Free, Refined Sugar Free, Vegan, Raw)

Macaroons are sentimental for me, they remind me of Passover, of containers of Manischewitz Coconut and Chocolate Macaroons.  The taste and texture is a taste of childhood and stealing a macaroon as a treat for myself.  Macaroons are not super sweet, and totally hit the spot for me as a child.  Just one fills me up.  

Recently, I had a store bought raw, vegan, gluten free macaroon, and I really wanted to create a recipe at home that was less sweet and even more healthy.  I am quite pleased with the results! 

The main difference, is I use vanilla powder instead of vanilla extract with alcohol, and carob pod concentrate instead of other sweeteners.  Carob is high in antioxidants and this is a very unique product that I am enjoying playing with in the kitchen.

Ingredients
  • 1 1/3 Cups of unsweetened coconut flakes
  • 1/2 Cup of almond flour
  • 2 1/2 teaspoons of raw cacao powder (more for more chocolatey taste)
  • 1/2 teaspoon of vanilla powder (I love this!) or vanilla extract
  • 1/8 teaspoon of pink Himalayan salt
  • 2 Tablespoons of coconut oil
  • 1/2 Tablespoon of carob pod concentrate (can use maple syrup instead)
Directions
  • Mix dry ingredients in a food processor
  • Add wet ingredients - the carob pod concentrate and coconut oil
  • Add more coconut oil if needed, but no more than an extra Tablespoon
  • Blend until well mixed and it starts to clump together - you may need to stop one or two times and wipe down the sides of your food processor to get everything back together
  • Taste! See if you want to add more raw cacao powder or adjust any of the flavor
  • Schmoosh into shape as in the photo, they don't roll
  • Freeze on a plate overnight, then you can store in the fridge in an air tight container
This recipe only makes 12 macaroons, they are rich and very satisfying. I think doubling the recipe is a good idea because they are so yummy and make great gifts too!

Hemp Milk - easy, flexible and yummy

23/11/2013

 
Print Friendly and PDF
Picture
(Gluten Free, Refined Sugar Free, Vegan, Raw)

As a family, we are not milk drinkers.  My kids have organic cows milk or homemade yogurt with their cereal in the morning, and that's it.  We do like cheese, both dairy and nut cheese, lately I'm addicted to both cashew cheese and goats cheese - yum!

I sometimes use almond milk when I cook, but again, not a lot, usually just buying the sugar free most natural one I could find.  Made it once or twice, but never really got into it... just not a milk drinker.

The other day, I decide to make hemp milk:
  • Super Easy - just whizz in the blender for 1 - 1 1/2 minutes
  • Flexible - can flavor as you wish
  • Yummy - as a dessert or with breakfast or for a snack


Ingredients
  • 1 Cup hemp seeds
  • 3 Cups of water 
  • 1 Date (none for sugar free, up to 3 for sweeter)
  • 1 Tablespoon of coconut butter/manna 
  • 1 teaspoon of vanilla seeds (I love this!)
  • 1 teaspoon of raw cacao powder
  • A dash of pink Himalayan salt

Directions
Add all ingredients to a blender (I use a Vitamix, but ANY blender will work)
Blend 1-2 minutes until smooth
Taste with a straw to see if you want to adjust the flavor
Put in a jar in the fridge, will last 2 days

Optionally, you can strain out the 'gritty bits' but I like keeping them in and stirring it before drinking.  If you do opt to strain (use a 'Chinese soup' bag, muslin, cheese cloth or nut bag), use the 'gritty bits' to make raw crackers, raw balls or when baking.

Now, hemp and water on their own, are really quite bland - so you can flavor this however you like - I did the above which was very mild, but could easily go for pumpkin spice for something seasonal or more cacao for a chocolatey treat!  

Let me know how it goes and your favorite flavor combination.


Perfect Wraps from Paleo Naan Recipe

19/11/2013

 
Print Friendly and PDF
Picture
(Gluten Free, Grain Free, Sugar Free, Vegan)

Usually I see a recipe, and change about 30% of it before I am happy enough to share it and call it my own.

Well, this three ingredient recipe from Ashley at My Heart Beets is absolutely perfect!  It makes the ideal wrap: stretchy, soft and flexible.  All with just three ingredients.
  • Tapioca flour**
  • Almond flour
  • Coconut milk
The only change I have made is to make them as thin as possible and use them as wraps - and they are amazing! The photo is of my dinner tonight, some salad and mild curried chickpeas I just wrapped up and ate.  

Please note you MUST use a NON-STICK pan for this recipe.  This has been confirmed by a friend who is a superb chef, and she just couldn't get them thin and right in a regular pan.

Another option comes from Alicia at Magic and Mayhem where in the comment section below she wrote 'you can make these without a non-stick pan if you have a well-seasoned old cast iron frying pan' she also adds a drop of coconut oil to the pan.  

I love wrapping food - for lunch today I used sprouted tortillas and put in homemade vegan fermented cashew cheese, guacamole and salad. Super yummy healthy meal to throw in my bag and eat after my Cantonese class.  

One wrap from dinner was saved to have tomorrow for my mid morning snack - thinking my homemade raw almond hemp seed butter and this raw chia mango jam.

Enough from me, go to the link to get the recipe, make them thin, and enjoy superb wraps with your next meal!  Or just make mini pancakes and serve them on their own as a 'bread' or put in the kids lunch boxes.

Here's the recipe: http://myheartbeets.com/paleo-naan-indian-bread/

** Tapioca Flour is also called Tapioca Starch and easy to find in local Hong Kong supermarkets or Asian supermarkets.  If you want organic, then try this Tapioca Flour.

Chocolate Cookie Dough Dip

16/11/2013

 
Print Friendly and PDF
Picture
(Gluten Free, Refined Sugar Free, Vegan)

This is my thing, it is what I bring to every party, it is what I often serve when people come over.  I debated not sharing this recipe!  So I have one request - if you ever invite me to your house, or come to my house, or you know we are going to the same party, please do not make this dip!  It's mine mine mine... but I like to share, so here is the recipe for when we are not celebrating and eating together.

The other week, I showed up at a party without it, and three people asked me 'did you bring your dip'? 

This is a sweet and savory dip, that both kids and adult love.  It is very hard to taste the individual ingredients, and people are usually surprised to find out what is in it!  Serving it with vegetables and fruit and it is a great addition to any afternoon playdate or party menu.

If you want to make it nut free, you can use sunflower (or other) seed butter instead of nut butter.

Ingredients
  • 1 - 1 1/4 Cups pitted dates (based on how sweet you want it), soaked 8+ hours
  • 1 1/2 Cups chickpeas or white beans (1 can, drained and rinsed well) 
  • 1/4 Cup nut butter
  • 1/4 teaspoon pink Himalayan salt
  • 1/8 teaspoon baking soda
  • 1 1/4 Tablespoon pure vanilla extract
  • 2 teaspoons raw cacao powder
  • 2 Tablespoons hemp seeds (added last for some texture)
  • Optional: add some coconut flakes for variety instead of the hemp seeds
Directions
  • Soak the dates for 8+ hours
  • Add the dates to the food processor with the metal S blade and blend**
  • Add the chickpeas and nut butter and blend more
  • Add some of the liquid from the dates if needed (I always have to!)
  • Add the rest of the ingredients
  • Blend until smooth, and then add the hemp seeds and pulse a few times.

Put in the fridge and serve cold with fresh cut celery, carrots, cucumber,cherry tomatoes, strawberries and our favorite gluten free crackers.

Will last a couple days in the fridge, also goes great in the school lunch box with veggies to dip!

**  I have also made this in my Vitamix - it comes out super smooth, but the food processor is easier to scrape every bit out with a spatula. When I use the Vitamix, I also find I have to add more liquid.  It is up to you which you use, I use both depending on if I want smooth or a bit crunchy.  

Credits:
http://chocolatecoveredkatie.com/2011/09/27/new-recipe-sugar-free-cookie-dough-dip/

Homemade Fermented Ketchup

12/11/2013

 
Print Friendly and PDF
Picture
(Fermented, Gluten Free, Vegan Option)

My kids are 6 and 7.  When they were much younger we avoided ketchup.  My kids were never *those* kids... the ones that put ketchup on everything.  Well, after years of camp and ski school, and eating with other kids of the same age, they now love ketchup. 

I get it, I really do, ketchup is the perfect umami flavor of sweet and salty and tangy.  But I do not like the idea of drowning food in sauces, nor of the ingredients in modern commercial ketchup.  We usually buy Annie's Organic Ketchup, which does have a great taste.  But once I started getting into fermenting, I knew I wanted to make my own fermented ketchup!

This week, I also started my Cantonese lessons, and guess what?  We learned the Cantonese word for Ketchup - 茄汁 (ke2 jap1). It does sound a lot like ketchup! Which really makes me believe that Cantonese is the origin of the word ketchup as suggested in many texts.

I found a few recipes, and they all strongly suggested that if you did not make your own tomato paste, to get one in a glass jar, specifically this organic one.

Even just after mixing it, before fermenting, it tasted great!  It is so easy to make!

Ingredients
  • 3 x 250 Gram jars of tomato paste 
  • 1/3 Cup wild raw honey (maple syrup or coconut sugar to make it vegan)
  • 3 Cloves of garlic 
  • 4 Tablespoons jun kombucha (or apple cider vinegar)
  • 7 Tablespoons homemade fermented sauerkraut juice (or water kefir or non-vegan whey)
  • 3 teaspoons pink Himalayan salt
  • 1 teaspoon cayenne pepper or smoked paprika or other flavor you like

Mix everything incredibly well, I used my Vitamix. One idea is to add some homemade dehydrated tomatoes.

Taste as you go - you might prefer it more/less sweet or more/less salty.

The extra tang the homemade fermented sauerkraut juice gave it really made a difference, I would only substitute with water kefir or whey (not vegan) if you don't have any kraut juice.  Also, you could do it just with salt if you had no other starters. 

Decant into a glass fermenting jar.  Depending on the temperature where you are, it could be 1-5 days - a taste test will let you know when it is done.  

As a final touch, I put it all into an old Annie's bottle, for our very own LantauMama's Homemade Fermented Ketchup - as seen in the photo below taken during a BBQ on our roof.

It is absolutely wonderful!!  No more stress about watching the kids dip their food into ketchup - they can have all they want of this fermented probiotic goodness!

Credits: 
http://www.homemademommy.net/2011/12/fermented-ketchup.html  
http://healthyfoodnaturally.com/2012/09/04/playing-with-fermentation-ketchup/
http://gnowfglins.com/2010/06/16/lacto-fermented-homemade-ketchup/
http://www.wildfermentation.com/forum/viewtopic.php?t=3562&f=5

Picture

Not So Sweet Raw Balls

9/11/2013

 
Print Friendly and PDF
Picture
(Gluten Free, Refined Sugar Free, Vegan, Raw)

I love the idea of yummy raw balls, but to be honest, I find many of them too sweet for my taste or feel they are only a 'treat' because they are so sweet.  I want to give my kids wholesome snacks, that are both nutritious and tasty, without relying upon sweetness as the main attraction.  

I have made many different raw balls, and the basic recipe is the same for most recipes - a sweet dried fruit like dates, raisins or figs, and nuts and/or seeds.  This week, I experimented with a less sweet version, that was full of healthy goodness.  

Although this recipe uses 20 dates, it also uses over 2 cups of nuts and seeds. Possibly because I soaked the dates for so long, these were truly not sweet. Also I made A LOT of balls, so there is very little date per ball.  

Dates provide the natural sweetness, but they also provide the fibre and nutrients to allow the body to break down and use the sugars, so therefore it places no further tax on the body. This differs from refined sugars which leech from the body and can cause harm.  

These are total winners - so say the kids, friends, my marathon running Cantonese lesson classmate and me!

Ingredients
  • 20 dates (soaked over night in water until really soft)
  • 1/2 Cup macadamia nuts
  • 1/4 Cup cashews
  • 1/4 Cup almonds
  • 1/4 Cup hemp seeds
  • 1/4 Cup unsweetened coconut flakes, more to roll in
  • 2 Tablespoons raw cacao powder
  • 1 teaspoon pink himalayan salt
  • 1/2 Tablespoon vanilla
  • 3 Tablespoons of water from the dates
  • 1/2 Cup of chia seeds

Directions
  • Add the dates to a food processor, without the liquid, and blend
  • Add the nuts to the food processor, and blend for a few minutes until well mixed with the dates
  • Add the hemp seeds, coconut flakes and blend more until well mixed
  • Add the raw cacao powder and pink himalayan salt
  • Add the vanilla
  • Continue to use the food processor on high until everything is evenly mixed
  • If you feel it is still too 'dry' then add some water from the dates, I added about 3 Tablespoons (see photos below for an idea of the texture)
  • Be sure it is all mixed, then at the last minute, add chia seeds and only mix gently to have them evenly spread around the 'dough'

Take them out of the food processor and roll into small balls 
Roll some on coconut flakes if you like, leave some naked 

Put in freezer or fridge on plates for them to harder, then transfer to a convenient container to store.

Store in the fridge or freezer.

Great in the kids lunch box or as snacks at the office or class - or just an afternoon or evening treat.

Why did I add the chia seeds last and try to leave them a bit more whole?
  • Chia seeds absorb liquid, but it takes about 10 minutes.  Since the dough needs to be 'wet' enough to roll, I thought that if I added the chia seeds last I could roll the dough easily, but then they would firm up a bit after they were made.  No idea if this theory is true or not, but it did work out well for me.
  • By adding them last and leaving them whole, it adds a bit of a different texture to the balls.

Picture
Picture
Picture

My Daily Green Smoothie

7/11/2013

 
Print Friendly and PDF
PictureGreen smoothies for the whole family!
(Gluten Free, Refined Sugar Free, Raw, Vegan)

I have a green smoothie every morning. It is my crutch, I am miserable without it.  I even have ways of having one when I travel and don't have a blender.  It is my main source of vitamins and nutrients to start the day, and usually keeps me full until about 11.   

This post is going to be short, I am not going to go on about the wonders of green smoothies, enough other blogs and articles do that... but I am going to share with you my 'standard' green smoothie base, which a few people have asked me about. and the extras I add for my own personal health as well as some things I add sometimes.

Green Smoothie Base:
  • 1-4 cubes of frozen kale or spinach**
  • 1 cup of other fruit - could be watermelon, mango, berries whatever we have to add some sweetness and vitamins - fresh or frozen
  • 1 ripe banana - fresh or frozen** (you can omit if you do not like bananas!)
  • Liquid - I use water kefir (if I don't have that, then kombucha or just water)

That is the base - that's it.  That makes a fabulous green smoothie and it is an ideal start to any day.  

Personally, I have a real need to pack in more to my smoothie - it is my first meal in the morning, and lasts me through to lunch most days.

Optional to add:
  • 2-4 Tablespoons flax seeds
  • 1 scoop green powder 
  • 1 teaspoon bee pollen
  • 1-2 Tablespoons liquid chlorophyll 
  • 1 teaspoon matcha green tee powder I buy in Japan (not for the kids smoothies as I don't want them having the caffeine) 
I sometimes also add:
  • some celery and/or carrots
  • A bit of turmeric, when I remember
  • A half lemon, when I remember
  • some ginger, when I remember
  • A ripe avocado, when I want something thicker and the extra good fats
  • 1 Tablespoon raw cacao powder, when I want a treat
  • 1 scoop acia berry powder, when I feel like it
  • 1 teaspoon maca powder (not for the kids), for weeks I use it, then I don't
  • 1 Tablespoon spirulina powder, when I feel like it
  • 1 Tablespoon of coconut butter or coconut oil
For liquid I use water kefir, coconut water kefir or just water.  I've also been known to use some mild kombucha when I am out of kefir.

This all gets whizzed up in my blender - I have a Vitamix, but for years I just had random blenders - any blender works.

Let me repeat: any blender works.

Then I pour it into my blender bottle or glass camelback eddy, add some chia seeds, shake it up, and drink about 10+ minutes later after the chia seeds have soaked.

Usually I take it with me to go and drink it in the car on the way to driving the kids to school.  If I am staying at home then I just use two huge glass beer glasses (from a loooong time ago) and drink it from those.

Some helpful tips:
Have all the fruit/veggies you plan to put in, already washed and chopped up in the fridge or freezer
For any powders you might add, leave them on the counter next to the blender so they are at hand
For anything that comes from the fridge, leave it all on one side of one shelf, so you can easily see and grab them in the morning

** Notes:
Bananas - lots of people don't like bananas, either the taste or how they make the smoothie a bit thicker - it's okay! You don't have to use a banana, but you do need some fruit to balance the vegetables.  

Kale - I buy kale in bulk and freeze it into Frozen Kale 'muffins' 

Spinach - The UK shop Waitrose does perfect organic spinach cubes and they are sold at our local HK supermarket

But I don't always use frozen spinach!  I bought some stunning sweet potato leaves from Dragontail Farm and put 2 huge handfuls in my smoothie this morning instead of the frozen spinach - super good!  I also use their amazing carrot tops - yummmm!

Remember:
do what you can, 
where you can, 
with what you have. 

Picture
Picture
Picture
Picture

The First Three Weeks

6/11/2013

 
Print Friendly and PDF
Picture
When starting any new eating pattern/habit/diet that is very different from your previous eating habits, it can be hard.  For example: going off gluten/wheat, removing sugar or going vegan. I have personally found the first three weeks to be the hardest by far! 

You might be missing your favorite 'old' foods, or still getting used to some strange 'new' foods.  

Around three weeks I start to get the hang of it: 
  • having the right foods in the house, 
  • knowing what I can and can't eat, 
  • learning that 'cheating' makes me feel bleh (be it bloated or uncomfortable)

By three weeks, I am more into the groove and have a food routine that works and the 'cravings' for the forbidden foods star to go away....

But whatever it is, don't beat yourself up.  The best advice I ever had was to see a change towards healthy eating as adding things rather than taking away. For example adding a green smoothie every morning.  This can be your only step... because once you start adding the healthy stuff, there becomes less room for the not so healthy stuff, and it even becomes less attractive because the healthy stuff makes you feel better. 

It sounds strange, but it is true - the more healthy foods you eat, the more your body starts to crave them.  You and your body make a great team!

So whatever your current diet is, don't stress and worry, but try to add one extra healthy thing to your eating routine this week... and see how you feel!

Written in response to Jane, a HK blogger, mama, runner and new to the VB6 diet:
http://dimsumandlongruns.blogspot.hk/2013/10/vegan-before-6-diet-update.html

Our Birthday Cake

4/11/2013

 
Print Friendly and PDF
Picture
(Gluten Free, Refined Sugar Free, Raw, Vegan Option)

This is my standard birthday cake - it is super easy, flexible and healthy.  Best of all it works for most diets except for nut allergies.  Because it is such a flexible recipe, I have included lots of options below - be creative and please let me know what works for you!


The Base:
  • 8 dates (unless they are very hard, no need to soak)
  • 1/2 cup of nuts (cashews, macadamia, almonds, etc...)
  • 1/2 cup shredded coconut
  • 2 Tablespoons raw cacao powder
  • 1/4 teaspoon pink Himalayan salt

Put in a food processor and blend.
Put in a pie dish or tray and mash down until evenly flat on the bottom.
Put in freezer or fridge

Middle Layer:
Option 1 - chocolate pudding
  • 4 ripe bananas
  • 2 Tablespoons coconut oil
  • 1 Tablespoon raw cocoa powder
Option 2 - Banana and peach custard
  • 2 ripe bananas
  • 1-2 ripe peaches or mangoes (use more if you want to omit the bananas)
  • 2 Tablespoons of coconut butter (use more for thicker custard)
  • 1-2 teaspoons of vanilla
Put in a blender and blend until smooth, then add on top of the base layer.
As an option you can layer some sliced fruit between the two layers.
Put back in fridge

Top Layer:
Option 1 - Whipped Coconut Cream (vegan)
  • 2 small boxes of coconut cream - cooled in fridge
  • 1 Tablespoon of vanilla extract
  • 1 Tablespoon of raw cacao powder (optional if you want chocolate flavored cream)
Option 2 - Fresh Whipped Cream (dairy)
  • 1 cup of fresh cream - cooled in fridge
  • 1 Tablespoon of vanilla extract
  • 1 Tablespoon of raw cacao powder (optional if you want chocolate flavored cream)
Right before serving, whip until light and fluffy (I use an electric whisk) 
Add to cake right away, then serve

If I do the whipped top layer, I like putting berries on top and making it look even prettier that way.

If I do just the 'custard' on top, then I can skip the whipped layer. It is really nice to do a pretty pattern of fruit or even a fruit mosaic on top.

I love sharing recipes, and over the years have shared this with a few friends.  Many of my friends are much more creative in the kitchen than I am, and make great changes to the recipes.  In fact, the custard filling was created by my friend Susan, (on Twitter @alohazen). Susan asked me for a raw vegan cake recipe, and I gave her this one which she modified by creating the custard option.  Here is a photo of her final piece of work which was devoured by her colleagues:

Picture

Credits: 
http://chocolatecoveredkatie.com/2012/05/13/ridiculously-easy-chocolate-pie-crust/
<<Previous
    Picture

    LantauMama's Instagram

    Categories

    All
    Breakfast
    Dessert
    Events
    Fermentation
    Healthy Living
    Hong Kong
    Kefir Class
    Kids
    Niseko
    Recipes
    School
    Snacks
    Tuesday-tips

    Archives

    May 2018
    January 2018
    December 2017
    October 2017
    August 2017
    March 2017
    February 2017
    November 2016
    January 2016
    December 2015
    September 2015
    June 2015
    May 2015
    March 2015
    September 2014
    August 2014
    July 2014
    June 2014
    May 2014
    March 2014
    February 2014
    January 2014
    December 2013
    November 2013
    October 2013

    RSS Feed

    View my Flipboard Magazine.
Thank you so much for taking the time to visit Lantau Mama, truly I am flattered that anyone reads this!  
Feel free to contact me anytime via LantauMama @ Twitter I would love to hear from you.
The links below are how I try to cover my hosting costs without using advertisements.
My Iherb Page
Weebly Discount Link