
LantauMama - making healthy living accessible
  • Blog
    • Family Fun
    • Cantonese School
    • About Me
  • Classes
  • Events
  • Shop
  • Links

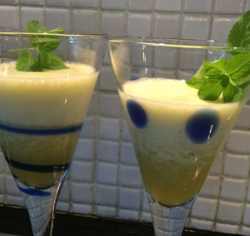
Kefir-Colada - Probiotic Mocktail 

24/5/2014

 
Print Friendly and PDF
Picture
(Fermented, Vegan, Raw, Gluten Free, Sugar Free) 

Sometimes a fancy drink is all you need... in my case, that means a fancy probiotic mocktail, and this is one of my favorites!

This specific drink was born of necessity.  I was teaching a water kefir class in Hong Kong, and the coconut water kefir was perfect that morning, then went a tiny bit too fermented right before the class (that happens easily in hot Hong Kong!).  The entire class tasted the 'too fermented' coconut water kefir, then I made it into a Kefir-Colada, and everyone loved the results!

It is really important to understand that there is always something you can do with kefir or kombucha that has gone 'too' fermented or 'too' sour - you can dilute it, put it in a smoothie, make a mocktail and more - be creative!


Ingredients
  • 2 cups of sliced pineapple
  • 2 cups of coconut water kefir (or water kefir)
  • 15 fresh mint leaves, plus extra for garnish
  • Optional: add some lychees or raspberries or ginger or anything else you fancy!

Directions
  • Put the pineapple and coconut/water kefir in your blender
  • Blend until smooth
  • Add the mint
  • Blend for just a second until specks of mint are showing throughout the drink

Pour into your fanciest cocktail glasses and enjoy with your family and friends - perfectly find for the little ones too, since there is no alcohol!

Hints
Coconut or water Kefir 'too' fermented - then this is the perfect way to use it!
Leftovers -  make probiotic ice pops for the kiddies to enjoy on a hot summer day.

Related Links
Kefir Class Notes
Coconut Water Kefir
Probiotic Ice Pops 
LoulaNatural's Alcoholic Kefir Kolada

Kefir - The Probiotic Elixir - Class Notes

6/5/2014

 
Print Friendly and PDF
Picture
Kefir is a simple to make drink that has over 35 strains of probiotics.  Most importantly, they live in the right ratios and in harmony to take action in your body right away.

Drinking kefir can help improve your digestion, immunity, reduce inflammation, increase mental clarity and improve your mood to name a few benefits.  It is good for everyone, from babies to the elderly - especially for pregnant and breast feeding mothers!  A healthy gut is the foundation for a healthy you.**

This brief overview tells you what you need, and what you need to know, to make kefir at home.  These notes have been designed for my Kefir - The Probiotic Elixir class in Hong Kong, but can also be used as stand alone information for anyone interested in learning more about kefir.  

There is also a slideshow at the bottom of this page with more kefir related photos.

What is kefir?
Kefir grains are a living combination of bacteria and yeast which live in a symbiotic relationship.  The grains can be used in sugar water, coconut water, juice, nut milks or dairy milk to make a natural healthy probiotic drink.  Kefir is alkalizing to your body.  The grains are not actually a 'grain', and the drinks, although made with sugar are not sweet.  The grains metabolize (eat) the sugar and produce beneficial probiotics, often along with some natural fizz!  The end result is not sweet, but can have an alcohol content of up to 1%, but often only 0.5%.

Why drink kefir?
Please refer to:
http://www.lantaumama.com/2/post/2013/12/kefir-and-kombucha-and-fermenting-why-why-why.html

How to make kefir?
Fermenting the kefir - this involves putting the grains in a 1-2 liter glass jar, feeding them with some sugar, and letting them sit for 8-24 hours.
Straining the kefir - to remove the grains and prepare the kefir for drinking.
At this point you can use the kefir, or decide to do a second ferment to give it some different flavors and some more fizz.
Second ferments involve letting the kefir soak with fruit, herbs or roots to flavor it naturally, for a very enjoyable probiotic drink.

Materials needed
1-2 liter glass jar with a wide mouth (good for air circulation and easy to clean)
1 plastic sieve (the grains don't like metal)
1 plastic funnel
1 liter glass jar with a stopper (see photo below right for two options)
kefir grains 
coconut sugar or maple syrup or other high mineral sugar (not honey)
filtered, non chlorinated water

Note on Sugar
There are two great coconut sugars available in Hong Kong - Cocobono and Stephen James Organics. Cocobono also has a ginger coconut sugar!  I use this organic grade B maple syrup from iHerb.  Both coconut sugar and maple syrup have lots of minerals in them that the kefir grains love, and are good for you too!  

Please remember, although we use sugar to make kefir, kefir is NOT sweet and does not have much sugar after - the kefir grains 'eat' the sugar and produce the probiotics.  Kefir is perfectly fine for those on a sugar free diet!

If you use coconut water, nut milk, fruit juice or dairy milk, you do not need to add sugar.  You only add sugar when you use plain water.

Picture
Picture
Picture
Picture

Detailed Instructions
Making kefir takes 8-24 hours in HK, depending upon the weather.  In summer it is often as fast as 8 hours, while winter can be 24 or more hours.  
Kefir grains are living, they change, they have moods, they have different needs at different times - what follows is a basic recipe, but as you ferment more and more you will find you need to adjust the amounts of sugar and the time based on how your grains and drink are coming out.  So this is more a 'starting guide' than an exact recipe that must be followed.

Part 1 - Starting the Kefir Ferment - this takes about 5 minutes

  • Add 1-2 Tablespoons of kefir grains
  • Add 2 Tablespoons of either coconut sugar or maple syrup
  • Add 1 liter of filtered water
  • Stir until the sugar is dissolved
  • Add half a fresh lemon or some dried pineapple (optional, the grains like the acidity and it adds a nice taste) 
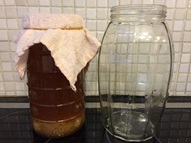
  • Cover with a cotton cloth secured on with a rubber band
  • Place in a warm place - the top of your fridge for example

Kefir loves to be agitated - move it, shake it, stir it, bump it when you walk by.  This is one reason the top of the fridge is a great spot as the fridge will move every time it is open and closed.

Taste after 8 hours, after 12 hours, after 18 hours, after 24 hours.  When it stops tasting sweet, and tastes somewhere between 'like nothing' and 'a bit sour' it is done!

OPTIONS:  Instead of using water and sugar, you can use coconut water, fruit juice or nut milk.  When you use coconut water, fruit juice or nut milk do not add any sugar, also do not add the lemon.  Please note that all of these will ferment much faster than water and sugar - so the times will be greatly reduced.

Part 2 - Straining the Kefir Grains this takes about 5 minutes

  • Use your strainer, and place it over a 1 liter pitcher or jar - use the plastic funnel under the strainer if you need to
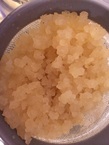
  • Strain the kefir water into the bottle, the plastic strainer will catch the grains for you to use them again
  • You can use the lemon in your smoothie or your second ferment - no need to throw it away!
  • Start your next batch right away, or store the grains in a glass jar in the fridge.

You can opt to drink it now - it will have a very mild taste.  It is great in your green smoothie or just straight up

Part 3 - Optional Second Ferment (Adding Flavors) - this takes about 5 minutes

  • Choose a second ferment jar - it can be closed or open.  
  • If you choose a closed jar - be sure to 'burp' it to let the gas out and minimize potential explosions.
  • In very hot weather, I prefer an open jar covered with a loose lid or cloth (keeps bugs out, and lets gas out, so no risk of explosions)  
  • Add your desired flavor to the jar, with the kefir water.  There is NO need to add more sugar
  • Let it sit on the counter for 12-24 hours, then taste it
  • Put in the fridge and enjoy!

Second Ferment Flavors for Water and Coconut Water Kefir
  • Ginger - hands down the favorite for my husband, he says it tastes like a really good 'ginger beer'
  • Ginger - use Cocobono Ginger Coconut Sugar for the first ferment, and fresh ginger in the second
  • Lemon - very refreshing
  • Ginger and Lemon - one of my favorites
  • Ginger, Lemon and Berries - another of my favorites 
  • Ginger and Turmeric Root - I keep this for when I am feeling run down and need a boost
  • Raspberry and Chia Seeds - fun for the kids and adults
  • Strawberry and Grated Ginger - one of my first students, Susan, made this and it was divine
  • Cranberry and Raw Cacao Nibs - gentle taste
  • Passion Fruit - when they are in season I love this
  • Pomegranate - either the seeds or juiced
  • Orange and Cinnamon - sliced orange and cinnamon sticks, serve with a cinnamon stick
  • Mango - my son insists on this one, you can make it with fresh or dried mangoes
  • Coconut Water Kefir and Lychees - like a probiotic lychee martini
  • Coconut Water Kefir and Ginger - very refreshing

Caring for your Kefir Grains
  • After you ferment a few times, you might find your kefir grains multiply - this is very common.  
  • To store your extra grains, keep them in a glass jar in the fridge.  
  • Rinse them with a bit of fresh water, then shake them dry in the plastic sieve.  The rinsing is optional and not a full 'shower' just a quick rinse.
  • You can also freeze grains for future use.  
  • The one time my grains went really really slimy and smelly, I gave then a baking soda cleanse.  This should not really be necessary, it was an exceptional case.  
  • I keep my water, nut milk and dairy milk kefir grains separate - because I teach classes and share grains, I want to be clear which grains are 'vegan' and which are 'nut free'.
  • If you start making dairy milk kefir, you will often find your grains 'disappear', don't worry!  This is very normal, just save some of the 'curd' from your milk kefir as your starter for the next batch.  If you want, you can add more water kefir grains to give it a boost too.

What next?
  • Go home, feed your kefir grains, and feed your gut!
  • Play with second ferment flavors.
  • Make coconut water kefir.
  • Make homemade almond milk kefir or hemp milk.
  • Make frozen probiotic ice pops.
  • Make coconut yogurt kefir.
  • Start some dairy kefir with cows milk - strain it after to make a lovely dairy kefir cheese.
  • Use your extra water kefir grains to make fermented nut cheese - super yummy.
  • Buy Culture Your Life by Naturopath and Nutritionist Louise Kane Buckley who writes at Loulanatural.  This book has many recipes with kefir for the kitchen, homemade shampoo and face wash, house cleaners and more!  

Resources for further learning
Articles and Recipes
Kefir and Kombucha and Fermenting - Why Why Why
Coconut Water Kefir
Almond Milk Kefir
Kefir-Colada a Probiotic Mocktail
Probiotic Ice Pops
Kefir and Kombucha - The Importance of Burping (your bottles!)
Coconut Yogurt Kefir 
How to Open a Coconut
Kefir Grains - Cleaning with Baking Soda
5 Ways to Heal your Digestive System
Kefir FAQ
What is Dysbiosis?
**Live Science - 5 Ways Gut Bacteria Affect Your Health
**The Economist - Gut Instinct 
NYT - Some of My Best Friends are Germs
HuffPost - What Your Gut Bacteria Says About You
Daily Mail - The Unlikely New Medicine... Pickled Cabbage

Videos
NPR - Gut Bacteria Cartoon 

Books
Culture Your Life
Wild Fermentation
The Art of Fermentation


Probiotic Ice Pops

6/5/2014

 
Print Friendly and PDF
Picture
( Fermented, Vegan, Raw, Gluten Free, Sugar Free) 

What kids don't love ice pops?  Especially on a hot summer day in Hong Kong, these are a go-to snack!

I have always made homemade ice pops for my kids, usually with fruit. Watermelon and chia seeds is the all time favorite, with coconut water and mango coming in a close second.

Now our ice pops have an extra probiotic boost from kefir!

Ingredients
  • 2 cups of cut watermelon and strawberries or other fruit
  • 1 cup of water kefir or milk kefir
  • a handful of blueberries

Directions
  • Put the fruit and water kefir or milk kefir in your blender
  • Blend for 1 minute or until all the fruit is blended
  • Pour into your ice pop molds
  • Add a few blueberries to 'float' in the ice pops - my kids love the 'blueberry surprise' when they eat them!

Flavor ideas
  • Water kefir + watermelon + chia seeds
  • Water kefir + watermelon + strawberries + chia seeds
  • Water kefir + berries + chia seeds
  • Milk kefir + mango
  • Milk kefir + strawberry 
  • Coconut water kefir + mango
  • Lemon water kefir + pineapple
  • Coconut yogurt + mango
  • Kefir Colada Pops

How to make Kefir - http://www.lantaumama.com/blog/kefir-the-probiotic-elixir-class-notes

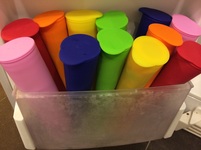
Below are the exact ice pop molds we use.  We even bring them on holiday with us so we can have ice pops everywhere we go!

Silicon Ice Pop Molds - these fit great in the freezer, and are good for ages 7 and up
Rocket Ice Pop Molds - these are easy to fill, and are larger so good for ages 5 and up
Star/Flower Ice Pop Molds - these are easy to fill, and are larger so good for ages 5 and up
Ring Pop Molds - perfect size for younger kids - or bigger kids whom are not so hungry

Click on the photo below to be brought to the appropriate Amazon page.  If you buy from that link, I get a tiny tiny commission (pennies), and it doesn't cost you anything extra :)


Coconut Yogurt Kefir

5/5/2014

 
Print Friendly and PDF
Picture
( Fermented, Vegan, Raw, Gluten Free, Sugar Free) 

So easy, so yummy, so good for you!  In Hong Kong, fresh young coconuts are easily available at the local supermarkets.  They provide lovely fresh coconut water to drink, and soft creamy coconut meat to eat.  Making coconut yogurt kefir is a great way to add even more probiotics to your daily diet.

The coconut water, you can drink straight, or ferment into coconut water kefir.


Ingredients
3-4 young coconuts
1/2 Cup of water kefir (more or less depending how much 'meat' your coconuts had)
1 Tablespoon of water kefir grains (optional)

Directions
Scoop the meat out of the young coconuts
Put it in your high speed blender (I use a Vitamix)**
Start to blend to see how thick/thin it is
Add enough water kefir to blend it smooth and creamy - to the consistency you want

Optional - if you have extra kefir grains you can add them too, this will make the coconut yogurt ferment more, but might get too sour for some people. This is completely optional, I only do it when I have a load of extra grains and know I will eat the coconut yogurt within 1-2 days.

You can eat it fresh at this point - my daughter loves it!
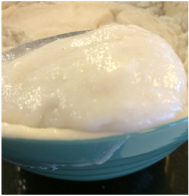
Alternatively, you can put it in a bowl on the counter to ferment for a few hours.  It goes fluffy and more sour this way, but I still love it (daughter does not).

Coconut yogurt can be eaten plain, added to a bowl of cut fruit, eaten with cereal, enjoyed as a creamy topping to any raw dessert and more.  It will last in the fridge up to 3 days so no need to finish it all at once.  After 3 days I find the taste is a bit too sour for most people.  
I also like to dehydrate coconut yogurt into coconut wraps - just spread thick on your non-stick dehydrator sheets!  For more on dehydrating click here.

WARNING!  Even in the fridge it expands, so please make sure your jar has room for the ever growing coconut yogurt.

** Note on blenders - you really do need a high speed blender to get coconut yogurt to the right consistency, regular power blenders just don't get it 'creamy' enough.

To learn how to open a coconut check out many videos on youtube or see this step by step photo instructions from Loulanatural:
How to Open a Coconut, step by step with photos

Related Links
Coconut Water Kefir
Loulanatural - Coconut Yogurt


Coconut Water Kefir

4/5/2014

 
Print Friendly and PDF
Picture
( Fermented, Vegan, Raw, Gluten Free, Sugar Free) 

Coconut water kefir is so easy to make, in fact it was the first fermented drink I ever made at home.

The benefits of this is that it is the easiest of all the drinks, and you can choose between using fresh coconut or boxed coconut water.

I use both boxed coconut water (be sure it is 100% coconut water, with nothing added) and fresh coconut water.  Both work just fine!

Instructions
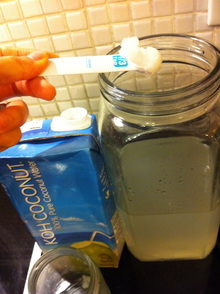
  • Put one liter of coconut water into a wide mouth jar
  • Add 1 tablespoon of water kefir grains
  • Stir
  • Cover with a cotton cloth secured on with a rubber band
  • Place in a warm place - the top of your fridge for example

  • Let it sit for 4-24 hours, depending upon the weather - taste at 4, 6, 8, 12, 16 hours to see how it tastes.  When it is less sweet and every so slightly sour (and possibly a bit fizzy) it is done.  In HK this is usually 4-8 hours.  
  • COCONUT WATER KEFIR FERMENTS MUCH FASTER THAN WATER KEFIR.
  • Use your strainer, and place it over a 1 liter pitcher or jar - use the plastic funnel under the strainer if you need to (see photo below)
  • Strain the coconut kefir water into the bottle, the plastic strainer will catch the grains for you to use them again

You can opt to drink it now, or add some ginger or berries or lychees or other flavor to the bottle for a second ferment to add more taste.   I find that the coconut water kefir ferments much faster than water kefir, and that the second ferments also are super fast - so do be sure to test them every few hours!

I often put this straight into my green smoothie in the morning.

For some reason, I often find that the grains I use in coconut water tend to get smaller in size and often get a bit slimy.  To help prevent this, mix up your grains - use them for coconut water, then with water and maple syrup, then with water and coconut sugar.  Or just add some fresh water kefir grains if you feel it is needed.  

Related Links
Kefir and Kombucha and Fermenting - Why Why Why
Coconut Kefir Yogurt 
How to Open a Coconut, step by step with photos

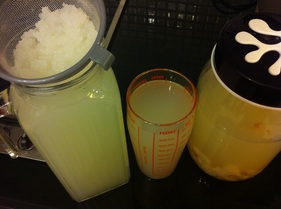
To the right is a photo of:

1.  The coconut water kefir, after straining out the grains with a plastic strainer

2.  A glass of coconut water kefir

3.  A second ferment of coconut water kefir with lychees in it - this ferments very fast and turned into something like a healthy coconut lychee martini! 
Picture

Kefir and Kombucha - the importance of burping

3/5/2014

 
Print Friendly and PDF
Picture
With second ferments of kefir and kombucha, it is common to do them in a sealed bottle to encourage some natural carbonation to make a healthy probiotic fizzy drink.

Of course, the danger is 'explosions'.

I make sure I 'burp' my bottles as shown in the below videos.

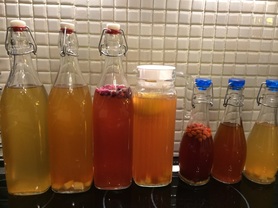
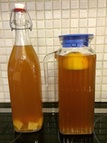
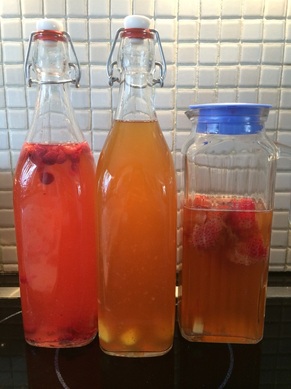
In summer, I often forgo the sealed bottle, and do the second ferment in a more open bottle.  You can see two of my 'closed' ferments on the left, and a more 'open' bottle on the right.  I still get a slight fizz in the open bottle.  Another option is a bottle with a cloth on the top (to keep out bugs, but let the gas out).

If you feel your bottles are too carbonated to burp, then put them in the fridge to slow down the fermenting, if you are still worried after that - open them outside!

When I travel across town to teach kefir classes, I bring my kefir bottles in a cooler bag with lots of ice blocks - nobody wants a class that starts with a bang.

The below videos show 'how to burp' your bottles. 

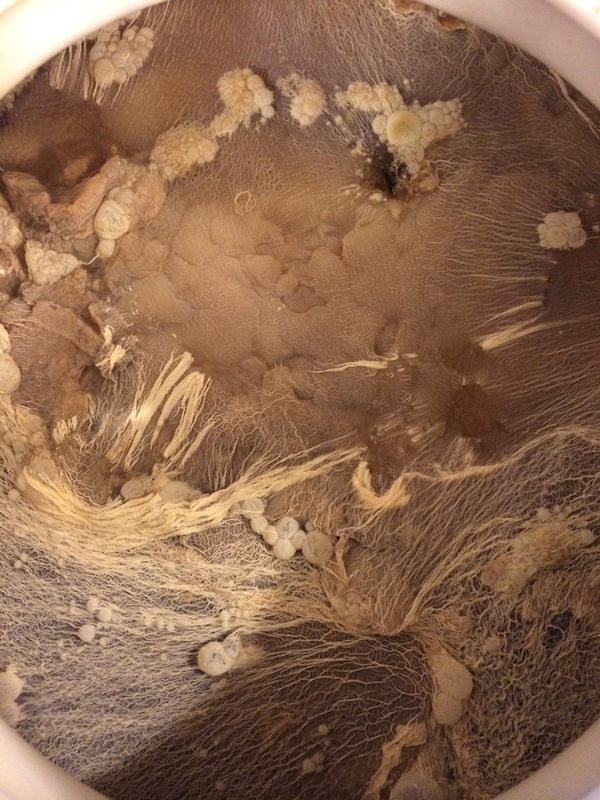
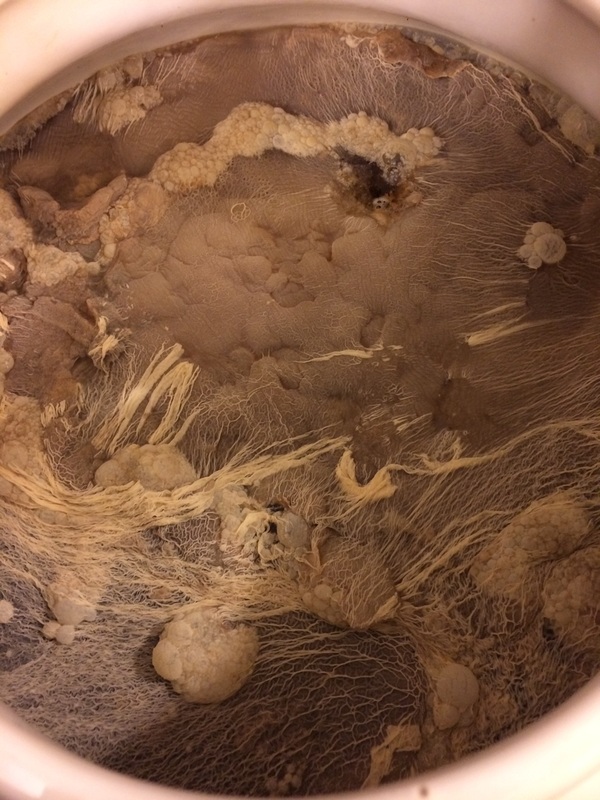
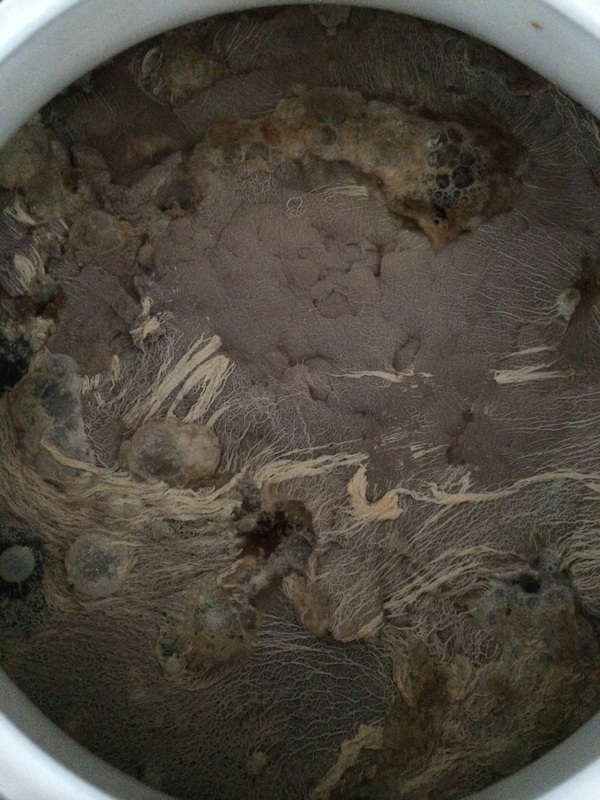
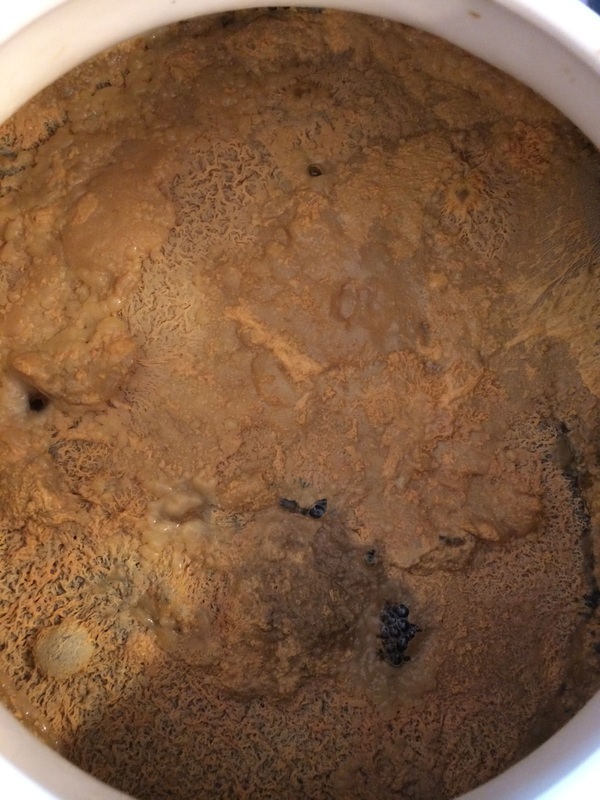
SCOBY beautiful SCOBY

3/5/2014

 
Print Friendly and PDF
(Fermented, Raw, Gluten Free, Sugar Free, Vegan)

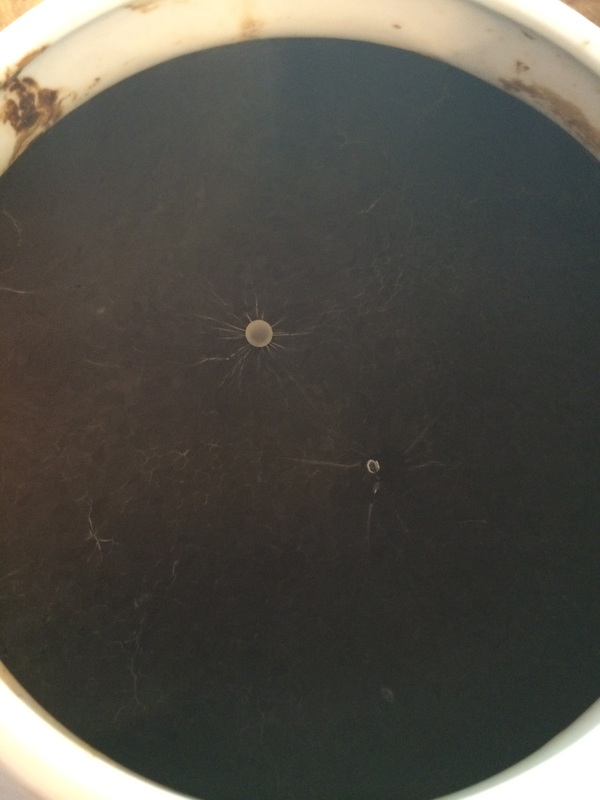
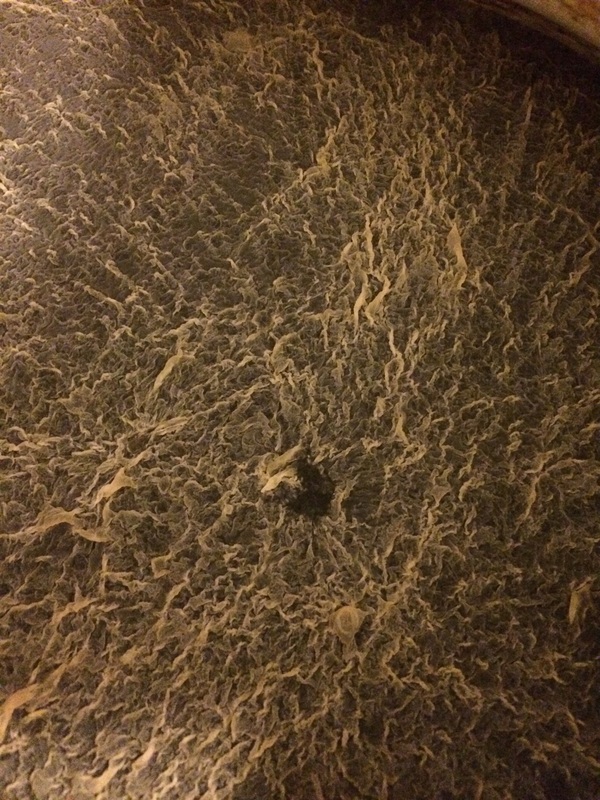
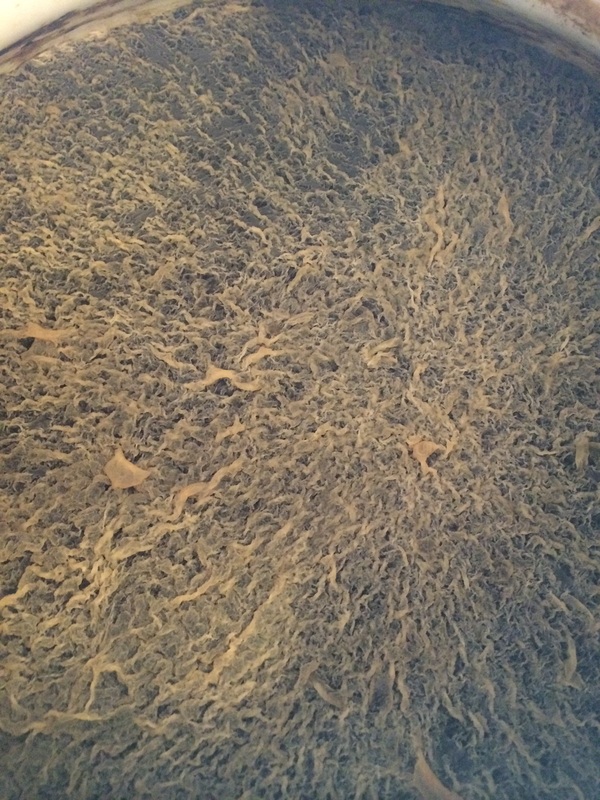
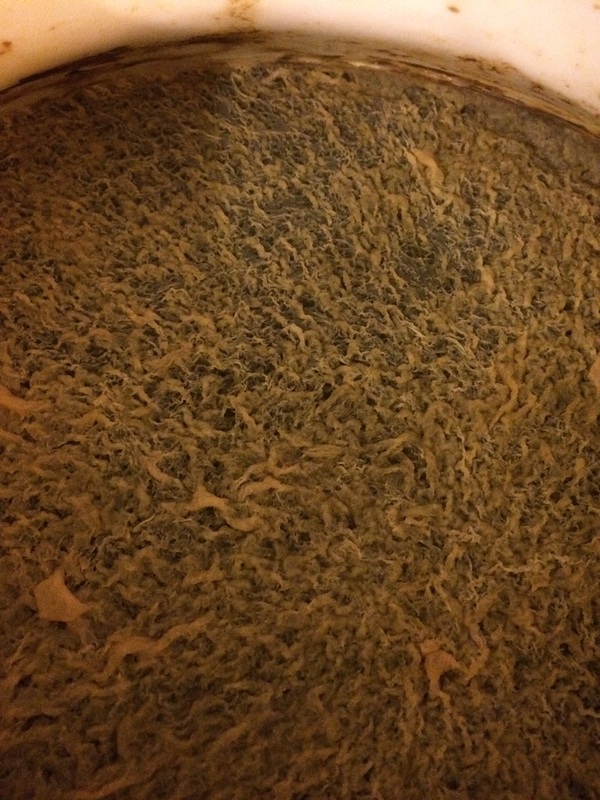
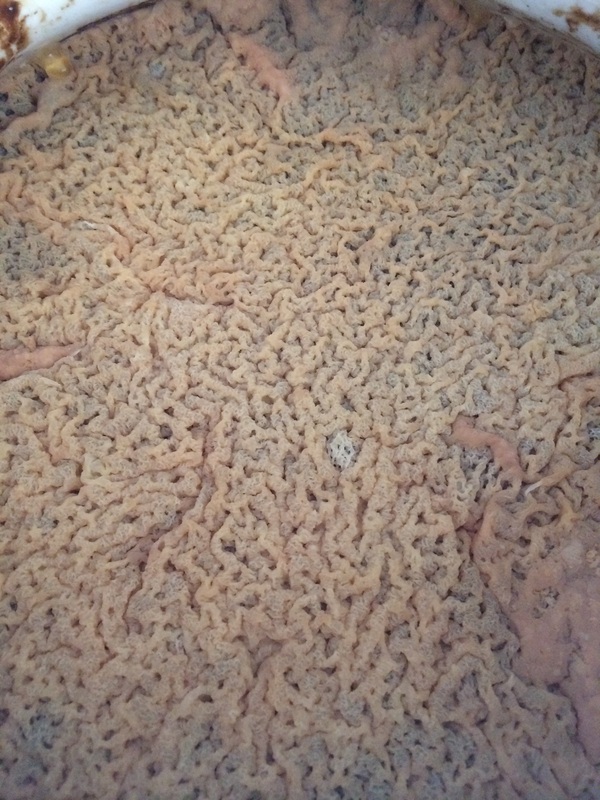
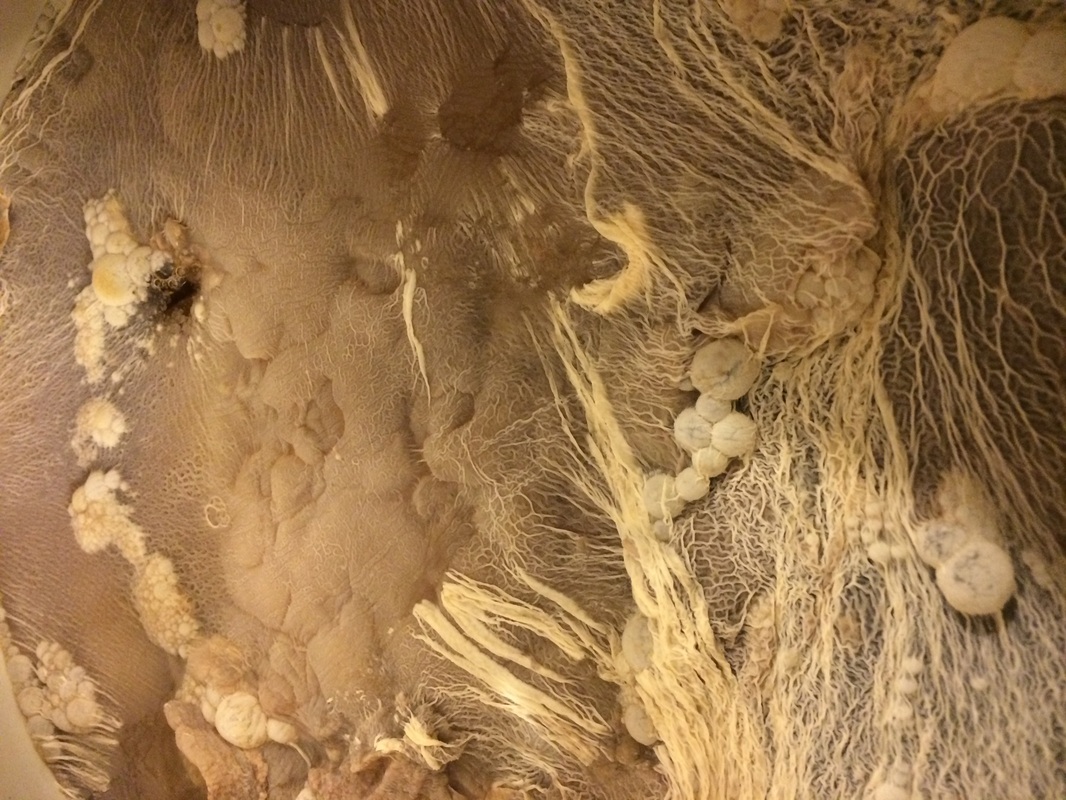
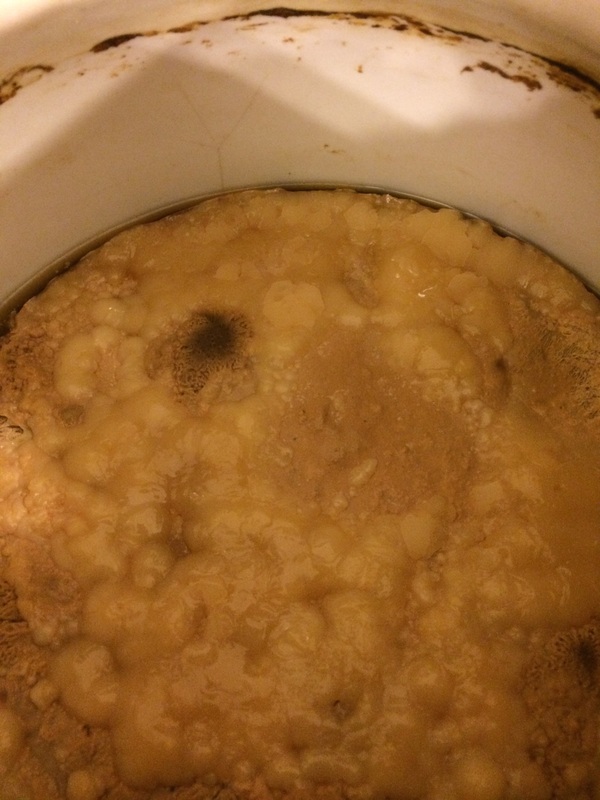
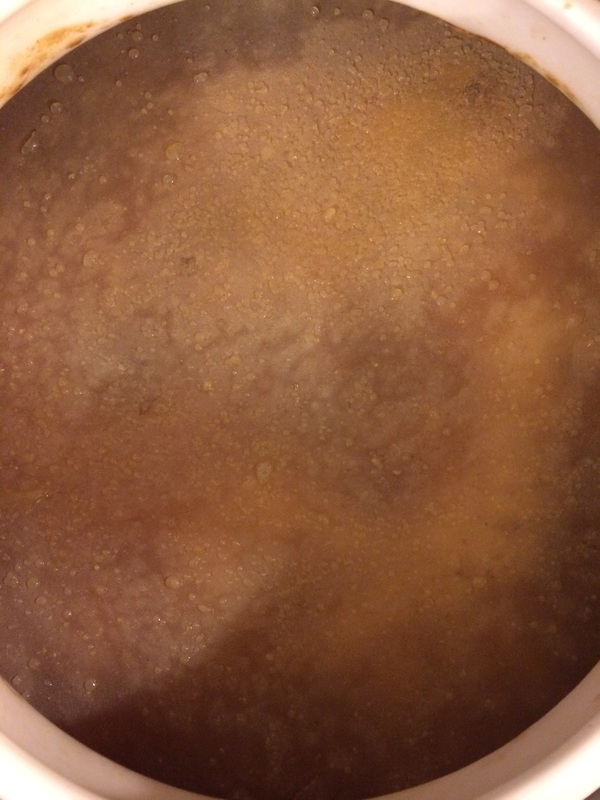
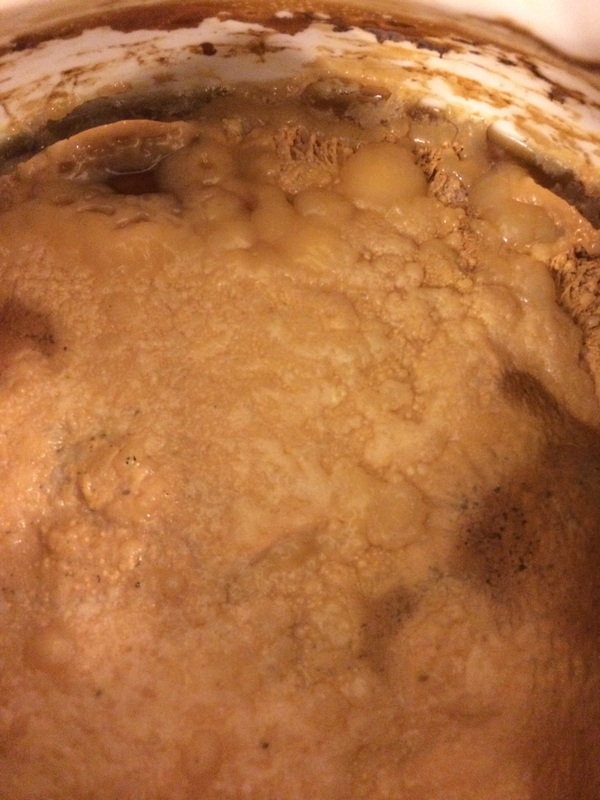
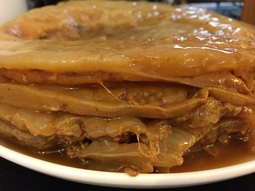
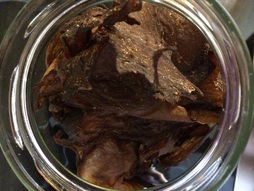
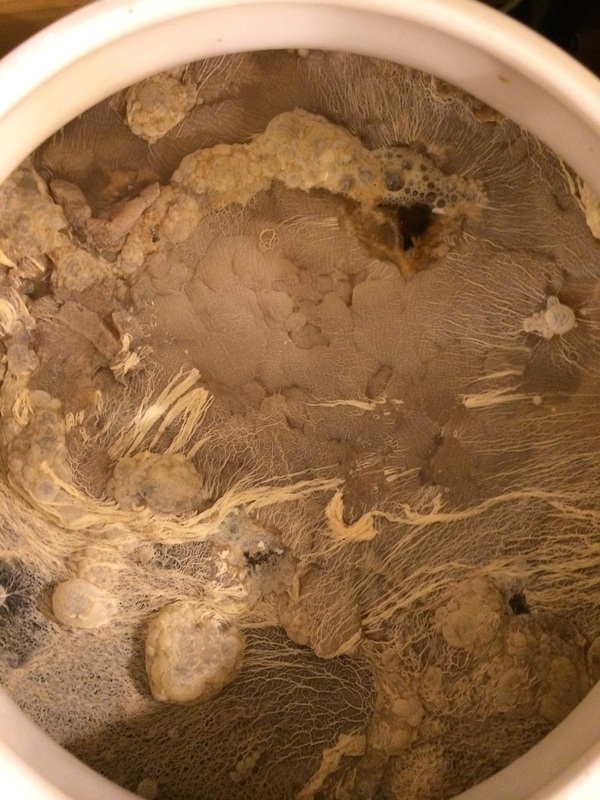
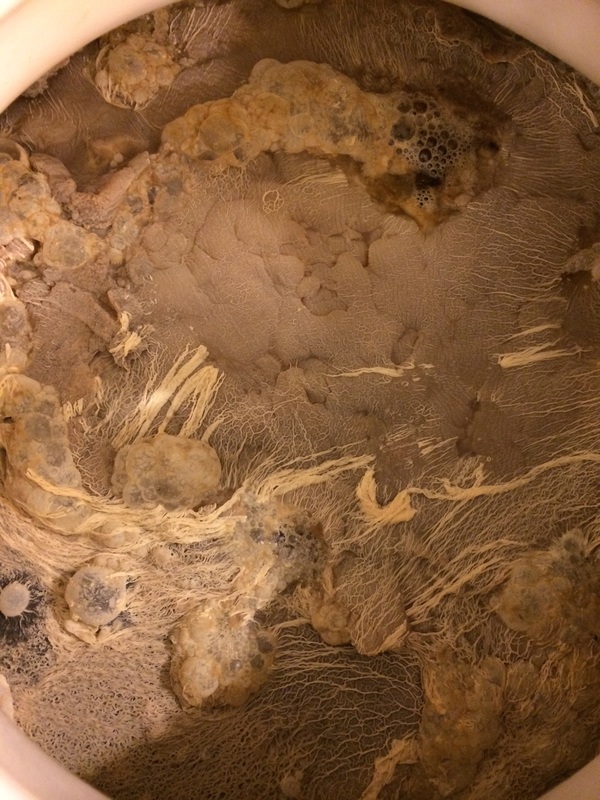
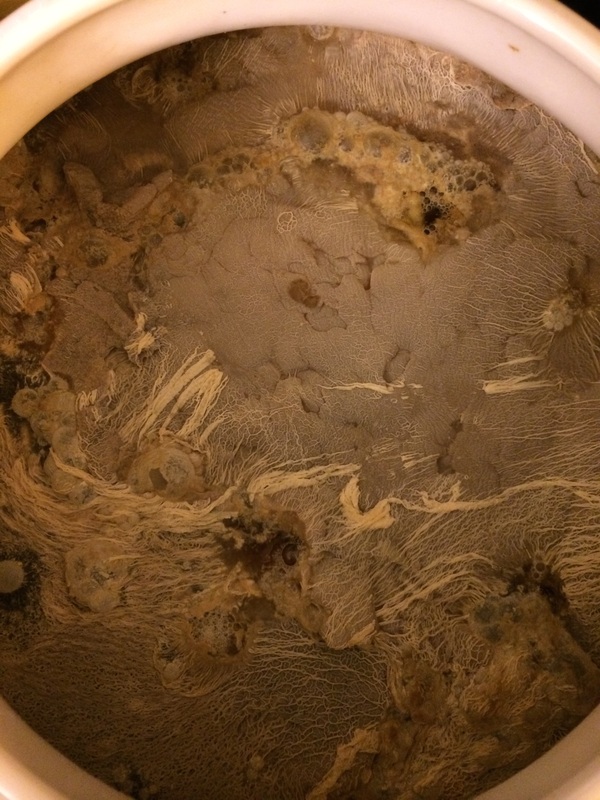
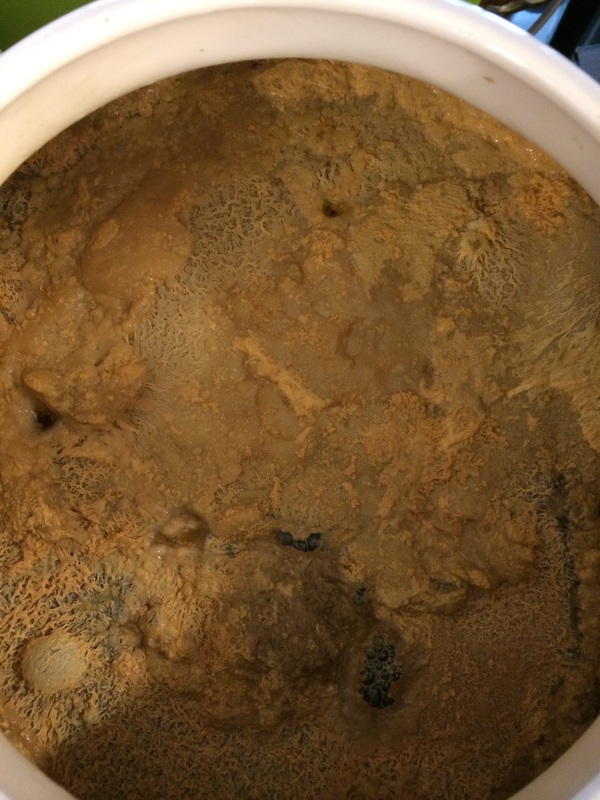
SCOBY, that Symbiotic Colony Of Bacteria and Yeast used to make Kombucha. I find stunningly beautiful - here are some photos of mine - including the one time I had mold... can you spot it in these Martian like landscapes? 
These photos include the development of a SCOBY as well as random photos of my beloved bacteria and yeast colony.  

Homemade Almond Milk Kefir

17/2/2014

 
Print Friendly and PDF
Picture
(Gluten Free, Vegan, Raw, Fermented, Refined Sugar Free) 


I love almond milk.  I love kefir.  What better than homemade almond milk fermented with kefir grains?!

This drink is smooth and tangy at the same time, and chock full of great probiotics for you.

Drink it straight, put it in your muesli, or mix it with some chia seeds for a raw dessert - however you use it it won't last long.

There are two steps to this process, first to make the almond milk, second to ferment it.

Do watch the slide show below for key steps in images and captions.  

Ingredients
  • 2.5 cups of almonds, soaked for 4-12 hours
  • 5 cups of water
  • 5 dates (soaked for 2-12 hours)
  • 1/2 Tablespoon of vanilla extract
  • 1/8 teaspoon of pink Himalayan salt 

Directions
  • Drain and rinse the almonds after they have soaked
  • Put all ingredients in your Vitamix or other high speed blender
  • Blend until smooth - 1-2 minutes
  • Strain through a cheese cloth, nut milk bag or Chinese soup bag**
  • Squeeze to get all the liquid out
  • Put the almond meal aside to use in the fabulous Raw Brownies with a Secret recipe.
  • Pour the almond milk into a glass jar

Now, you could just stop here, and enjoy your almond milk - and trust me, I did, at least one glass before fermenting the rest!

To Ferment
  • Add 2 Tablespoons of kefir grains*** to your large glass jar of almond milk
  • Cover with a cloth and rubber band and place in a warm place to ferment (the top of the fridge is good)
  • Ferment for 4-12 hours depending on the weather - taste after 4 hours, then every couple hours until it is the taste you like
  • Don't worry if the almond milk kefir separates (see photo below), it is normal, just stir it with a non-metal stirrer and either keep fermenting or strain depending on the taste.  
  • Once it tastes right to you, strain the grains with a plastic strainer
  • Save the grains in a glass jar in the fridge to use again

Once fermented, put in a glass bottle with a lid put in the fridge.

We usually finish it within two days, but it will last almost forever in the fridge. Did I mention a glass of Almond Milk Kefir goes great with these Raw Brownies?

You can also use this to make an awesome smoothie - almond milk kefir, some berries, acai berry powder and a banana - sooooo good!  This is a great way to use it if you accidentally ferment it a bit too long.

** Chinese Soup Bags can be found in the local ParkNShop or Wellcome in Hong Kong, they cost about 10 HK for 3 bags - great value and perfect for nut milk!

*** I use water kefir grains, then I keep them separate from my other grains in a jar dedicated to using with nut milks.  You can also use dairy milk grains, and they will work fine as well, it depends on what you have.

**** The reason I keep my nut milk grains separate from my other grains, is so that if I am sharing grains with someone with a nut allergy, I know not to give them the nut contaminated grains.  This is just a precaution because I love sharing my kefir grains.

Related Links
LoulaNatural - Raw Almond Milk
LoulaNatural - Kefir FAQ


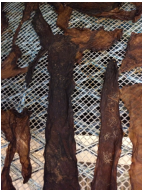
Kombucha SCOBY Jerky

16/12/2013

 
Print Friendly and PDF
PictureSCOBY jerky art!
(Fermented, Raw, Gluten Free, Sugar Free, Vegan Option)

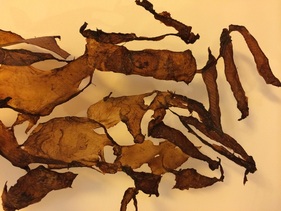
Too much SCOBY, what a great 'problem' to have!  There are so many things you can do with a kombucha SCOBY.  Previously I have eaten SCOBY, put it in my green smoothies, put it on cuts and burns and even on a stye on my eye.  

I left the SCOBY in my continuous brew kombucha for over two months, and it was huge (see photo below).  Also there was a huge jar of 'back up' SCOBY in my fridge that was taking up space. 

For a while I have really wanted to make SCOBY Jerky.  There is a wonderful recipe for Cinnamon SCOBY Snacks in Loula Natural's amazing Culture Your Life ebook (which I cannot recommend highly enough!!), and a recipe for SCOBY Jerky at the Holistic Squid website.  

Based on those recipes, I did the following using only a couple ingredients and a very simple method.  Honestly, I was skeptical that I would not get the flavor right or it wouldn't work, so I didn't put a lot of effort into it.

Amazingly, they came out great! Savory, slightly salty, super chewy and addictive!

The photo above is of a 'tray' of SCOBY jerky after I took it off the dehydrator shelf and before I separated it.  It looks like modern art in that photo!

Ingredients
  • Kombucha SCOBY (see photo below left for what I used)
  • Tamari Sauce (can use soy sauce if you prefer)
  • Wild raw honey (use a different sweetener if you are vegan)
  • Garlic (smashed or powder)
  • Onion (minced or powder)
  • Cayenne pepper (just a tiny amount of powder)
  • Other flavors as you like
Directions
  • Take SCOBY and separate it into thinner 'pancakes'
  • Rinse under filtered water 3-5 times until most of the kombucha is washed off
  • Cut into strips, random sizes are fine
  • Dip into a bowl with 1/2 cup tamari, 1/8-1/4 cup honey (more if you like sweeter), some fresh or powdered garlic, onion or other flavors you fancy, a dash of cayenne - all mixed up
  • Make more or less of the dip depending upon how much SCOBY you have
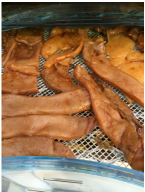
I then took a baking tray out of the oven, and put a single dehydrator tray on it - then layed out the dipped SCOBY, and let them drip for a few minutes before putting them in the dehydrator, as I didn't want the dehydrator to get lots of drips in it.  I also lined the bottom of the dehydrator with one of my non-stick mats to catch any drips.

Put in dehydrator at 105 degrees for 12-15 hours.  At about 6 hours, check the trays, you may need to move some of them around so the thickest SCOBY cuts are at the top and back shelves.

Try it and flavor however you like!! I like savory more than sweet, but I will try some other variations next time.  My daughter has requested vanilla next time!!

Picture
2 month old SCOBY
Picture
jar of SCOBY jerky
Picture
dipped and in dehydrator
Picture
SCOBY jerky, chewy & yummy!

Kefir Grains - Cleaning with Baking Soda
11/12/2013

 
Print Friendly and PDF
Picture
I make and drink about 1-2 liters of kefir water a day. Grains are really sturdy things, they multiply like crazy, and can live through most events.  Most grains would never need to be rinsed or washed.
Recently, my grains started to get a bit smelly, then they got really rotten egg / sulfur smelly, and so did my kefir water.  The kefir water got so bad, I could not drink it, nor even use it to wash hair - it was that smelly!  I had about 3 cups of grains at the moment, and didn't want to lose them all.  In the past this happened a couple times, and a quick rinse with water was all that was needed, but this time it was really strong and no amount of water rinsing was working.

Apparently the slimy texture of the water and the rotten egg smell might come from too much minerals - which would make sense as I use coconut sugar which is full of minerals. Also, the weather just changed from summer to winter here in Hong Kong, and my brews went from 12 hours to 24+ hours, but I had not yet reduced the amount of sugar I was using.

I tried to find something online about rinsing grains, but there is little info out there - and what I did find was either too simple (rinse with water, which I had previously tried) or much too complicated involving boiling water, cooling water, egg shells, etc...

My solution was simple:
  • Rinse the grains in filtered water 2 or 3 times
  • Put them in a 1 liter glass jar with plastic lid
  • Add filtered water until they are all submerged
  • Add 1 Tablespoon of baking soda
  • Shake the jar, and put it in the fridge
  • 12 hours later, rinse the grains from the jar
  • If they are still smelly (mine were!), repeat the above steps
  • 24 hours later, rinse the grains from the jar

Mine were then perfectly opaque and not smelly at all!
Best off all, 24 hours after that I was back to enjoying perfect tasting water kefir - yeah!

To prevent this from happening again, I am using less sugar.
  • 2 liters of filtered water
  • 3 Tablespoons of coconut sugar
  • 4-8 Tablespoons of water kefir grains
This will hopefully keep them happy and healthy!

I also rotate my grains - keeping them in two different jars in the fridge, and using one jar for a week, then the other jar, so they get a chance to rest.  

Just a note on the timing - in summer in Hong Kong, it is hot and humid, and my kefir water takes 8-12 hours.  In winter in Hong Kong, it is cool and dry, and my kefir water takes 24 hours.  

Related Links

http://loulanatural.com/kefir-faq/
http://www.yemoos.com/faqwamain.html
http://www.culturesforhealth.com/rehabilitating-fixing-repairing-damaged-water-kefir-grains
http://chemistry.about.com/cs/foodchemistry/f/blbaking.htm
http://culinaryarts.about.com/od/bakingdesserts/a/Baking-Soda-And-Baking-Powder.htm

<<Previous
Forward>>
    Picture

    LantauMama's Instagram

    Categories

    All
    Breakfast
    Dessert
    Events
    Fermentation
    Healthy Living
    Hong Kong
    Kefir Class
    Kids
    Niseko
    Recipes
    School
    Snacks
    Tuesday-tips

    Archives

    May 2018
    January 2018
    December 2017
    October 2017
    August 2017
    March 2017
    February 2017
    November 2016
    January 2016
    December 2015
    September 2015
    June 2015
    May 2015
    March 2015
    September 2014
    August 2014
    July 2014
    June 2014
    May 2014
    March 2014
    February 2014
    January 2014
    December 2013
    November 2013
    October 2013

    RSS Feed

    View my Flipboard Magazine.
Thank you so much for taking the time to visit Lantau Mama, truly I am flattered that anyone reads this!  
Feel free to contact me anytime via LantauMama @ Twitter I would love to hear from you.
The links below are how I try to cover my hosting costs without using advertisements.
My Iherb Page
Weebly Discount Link